|
Thawing | Cleaning | Stuffing | Brining | Marinating | Rubs | Cutting
Thawing
There are two different methods that are commonly used in order to properly and safely thaw a frozen turkey: the refrigerator method and the cold water method. A third method, thawing in the microwave, is sometimes used when quick defrosting is necessary.
Refrigerator Method
Placing a frozen turkey in the refrigerator is the best and safest method for thawing. The turkey should be kept in its original wrapper during the thawing process. Thawing the bird in the refrigerator may take a long time, especially if the turkey is a large size, but it is absolutely the safest method for thawing. The cool temperature of the refrigerator (usually no higher than 40°F) discourages the rapid growth of harmful organisms in the turkey as it thaws. 24 hours for every 5 lbs. defrosting time should be allowed to properly thaw the turkey. This time may vary because of the individual temperature settings of different refrigerators.
Recommended Refrigerator Thawing Time
|
8 to 12 pound frozen turkey
|
2 to 3 days |
|
13 to 16 pound frozen turkey
|
3 to 4 days |
|
17 to 20 pound frozen turkey
|
4 to 5 days |
|
21 to 24 pound frozen turkey
|
5 to 6 days |
Cold Water Method
Thawing a frozen turkey in cold water is another good defrosting method. As with thawing in the refrigerator, the bird should be kept in its original wrapper and immersed in cold water. Make sure the water is very cold and if the original wrapper has any punctures or tears in it, the turkey should be placed in another plastic bag and sealed. The turkey should be placed breast side down and it should be completely covered with water. The water should be changed every 30 minutes. This method is much faster than thawing in the refrigerator (usually 8 to 10 times faster), but it can be annoying having to change the water every 30 minutes. At least 30 minutes defrosting time per pound should be allowed when using the cold water method. Once the turkey is thawed, either cook it immediately or place it in the refrigerator until you are ready to roast it.
Recommended Cold Water Thawing Time
|
8 to 12 pound frozen turkey |
Allow 4 to 6 hours |
|
12 to 16 pound frozen turkey |
Allow 6 to 8 hours |
|
16 to 20 pound frozen turkey |
Allow 8 to 10 hours |
|
20 to 24 pound frozen turkey |
Allow 10 to 12 hours |
Microwave Method
An alternative to refrigerator and cold water thawing is defrosting in the microwave. This may work in a pinch, but it is not highly recommended because many microwave ovens do not defrost evenly. While waiting for the bird to fully defrost, bacteria may grow quickly in areas where the turkey is already defrosted. It is important is follow the manufacturer's instructions to ensure that the microwave oven is used properly for defrosting. The turkey should be roasted immediately after defrosting in the microwave.
| Note: NEVER thaw turkey at room temperature. Harmful bacteria will grow rapidly creating toxins that may still be present after the turkey is cooked. Frozen turkey that has been thawed should not be frozen again until after the meat is cooked in order to reduce the risk of harmful bacterial growth. |
| Note: A frozen prestuffed turkey should not be thawed before it is cooked because bacteria can multiply rapidly in the stuffing while the turkey is defrosting. |
Cleaning
After the turkey has thawed, the packaging is removed. The neck and the giblets are usually found inside the body cavity so these can be removed and discarded, or if they are to be used, they should be washed with cold water and patted dry with paper towels. The turkey should be thoroughly washed inside and out with cold water and then patted dry. Proper food handling practices must be followed during the preparation of the turkey in order to avoid possible problems with food poisoning.
- The raw turkey, giblets, and their juices should not be allowed to come in contact with any other food item.
- After handling the raw turkey, your hands will be contaminated. Do not touch any other food items and as few surfaces as possible before your hands have been thoroughly washed.
- Cutting boards and utensils must be thoroughly washed after preparing the turkey for the oven.
- Do not place cooked food on the same plate that held the raw food.
- Besides using soap and water for cleaning surfaces, bleach or an antibacterial spray may be used to help kill any organisms that the soap and water missed.
Stuffing
For the best results, the stuffing should be prepared just before the turkey will be stuffed and the turkey should be stuffed just before it is ready to go into the oven. This will reduce the risk of bacterial growth. Some cooks make the mistake of preparing the stuffing and placing it in the turkey well in advance of roasting the bird in order to save time, but this is a dangerous practice. Even if the stuffing is to be baked in a separate dish, the ingredients for the stuffing should not be mixed together until just before the dish will be placed into the oven. There are, however, some steps that can be taken to save time such as chopping the vegetables or preparing dried, cubed bread for the stuffing base. This makes it easy to quickly prepare the stuffing ingredients just before the turkey is to be cooked.
The total quantity of stuffing that is prepared may not fit properly in the turkey. In this case, the extra stuffing can be cooked in a baking dish. Many cooks prefer to place all of the stuffing in a baking dish because an unstuffed turkey does not require as much time to cook to the proper temperature. Listed below are some important points to remember concerning stuffing:
- The turkey should not be overstuffed. The stuffing will expand during the cooking process and some of it may not cook thoroughly because of the density of the stuffing inside the turkey.
- The stuffing should be cooked to a temperature of at least 165°F.
- Remove the stuffing from the turkey before the turkey is carved.
- Allow as much as 3/4 cup of stuffing per pound of turkey or as much as 1 cup for each guest.
| Note: NEVER stuff the turkey in advance. The stuffing may promote the rapid growth of harmful bacteria. Leftover stuffing should be refrigerated and used within 1 or 2 days. It should never be frozen to be used at a later date. |
Brining
Brining a whole turkey is a simple process that results in moist and flavorful meat, although it usually tastes saltier than turkey prepared with other methods. A large stainless steel or glass container is required to accommodate the turkey and the brining solution. It is important that the container or pot be non-corrosive, otherwise the salt that is used may cause a chemical reaction with the container. A 16-pound turkey requires about 2 pounds of table salt and 2 gallons of water. Kosher salt may also be used and may be preferable since it doesn't contain the additives that are found in table salt. Regardless of the type that is used, the salt should be dissolved in the water before placing the turkey into the container. The turkey should be completely submerged with the brining solution. Other flavorings can be added to the solution including various herbs, spices, or sugar. The container should be covered and placed in the refrigerator about 6 hours. After the required soaking time, the turkey is removed from the container, thoroughly rinsed under cold water, patted dry, and placed back in the refrigerator overnight to allow the surface to dry thoroughly. It is then removed from the refrigerator and roasted.
The brining process breaks down and extracts some of the proteins from the meat, allowing liquid to be absorbed into the turkey. When the turkey is cooked, the proteins coagulate, preventing the liquid from escaping.
| Note: The brining process is much more manageable with a turkey that is no larger than 16 pounds. |
Marinating
Soaking a whole turkey or turkey parts in a marinade is a good method for adding flavor as well as to help tenderize the meat. A proper marinade should contain an acidic ingredient such as vinegar or wine, oil such as olive oil, and seasonings such as herbs and spices. Citrus fruit juices may be used instead of the vinegar or wine to provide the acidic ingredient that is necessary to soften the tissues of the meat.
There are several important points to remember when using a marinade:
- Quantity: It may not be possible to completely cover a whole turkey with the marinade, but several inches of liquid should be added to the container so that the turkey can be turned occasionally, allowing all portions of the turkey to benefit from the marinade. Turkey parts or slices of breast or thigh meat should be completely covered with the marinade.
- Soaking Time: Turkey parts require only a couple of hours marinating time, while a whole turkey should be soaked in the marinade for several hours or overnight.
- Refrigeration: Always marinate turkey in the refrigerator.
- Proper Containers: Since the marinade contains an acidic ingredient, reactive containers such as metal bowls should not be used. A large glass bowl is the best container to use, but large plastic bowls may also be used. Large plastic bags that can be sealed are ideal for marinating turkey parts.
- Reuse: The marinade should not be reused for any other purpose because of the bacteria that may be present from having been in contact with the raw turkey.
| The oil, acidic ingredient, and seasons are added and combined in a glass bowl. |
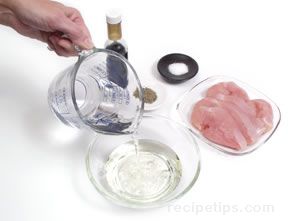 |
| The turkey pieces are added to the marinade. |
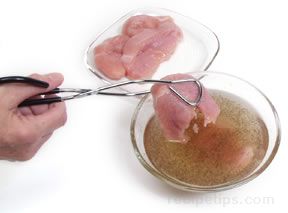 |
| The bowl is covered and placed in the refrigerator. The turkey slices shown in the picture at the right should be allowed to soak for a couple of hours. More time is required for larger turkey parts or for a whole bird. |
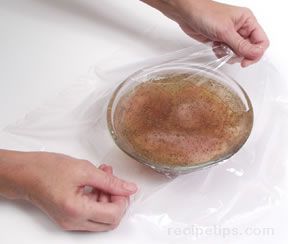 |
Rubs
An additional option for flavoring turkey is with the use of a rub. A rub is basically a dry mix of herbs and spices that are applied to the raw meat and are allowed to permeate and flavor the meat over a period of time, usually overnight in the refrigerator. An endless variety of rubs can be prepared for turkey depending on the flavors that are desired. A rub mixture can be patted onto the turkey, but the moisture from the meat can cause the dry ingredients to stick to your hands. The best results often occur when the ingredients are sprinkled evenly on all sides. When turkey is grilled, a rub can provide a flavorful crust on the surface and help to seal in the moisture, especially if the skin has been removed from the turkey.
Cutting Up a Whole Turkey
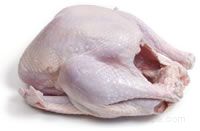
Turkey parts such as breasts, legs, or wings can be purchased already cut and packaged at most food stores, but it is usually more economical to purchase a whole turkey and cut it up at home. The turkey should be well chilled, which will allow it to be cut up more easily. A sharp knife is essential and a heavy-duty kitchen shears is helpful.
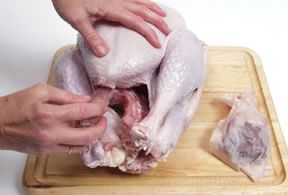
| Remove the leg clamp and then remove the giblets and neck from the body cavity before cutting the turkey into individual parts. |
 |
 |
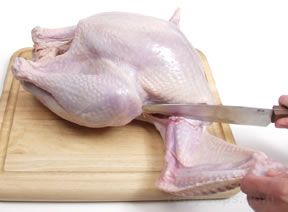
| A turkey wing can be removed by pulling it away from the body and cutting into the hollow area between the wing and the breast. When the wing joint (shoulder joint) has been exposed, cut through it while continuing to pull on the wing in order to release it from the body. The process can be repeated for the other wing. |
 |
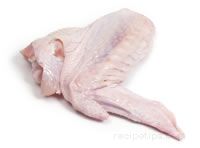 |
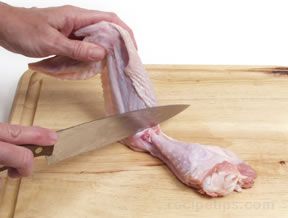
| The wing can be cut into three sections. The upper portion can be cut at the elbow joint. This section is known as the drummette. (It is worth noting that a turkey drummette from a bird weighing 12 pounds or more is larger than a drumstick from a chicken.) |
 |
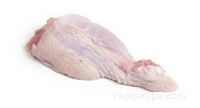 |
| The flat middle section of the wing beyond the elbow may be separated from the wing tip and used as one piece. |
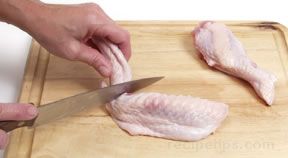 |
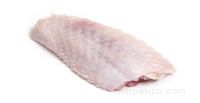 |
| There is not much meat on the wing tip, but it may be saved and added to soup or stock to provide flavoring. |
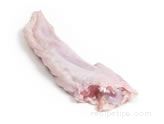 |
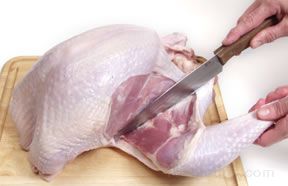
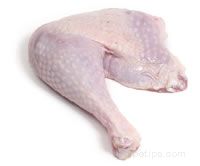
| A turkey leg is removed by cutting through the skin between the thigh and the body to reveal the joint. Continue cutting while pushing on the leg to open the joint and then cut through the joint to release the leg. Repeat this procedure for the other leg. |
 |
 |
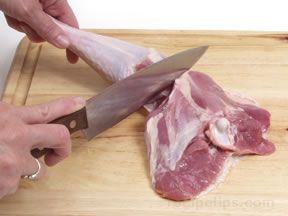 |
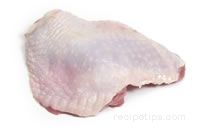
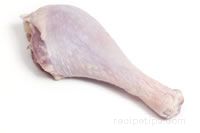
The leg can be left as is or it may be cut at the middle joint to form two pieces known as the thigh and the drumstick. Thigh meat is often sold with the bone removed. |
|
Thigh
|
Drumstick
|
| The breast can be removed whole or in halves with the bones remaining or the breast can be boned to make preparation and serving easier. |
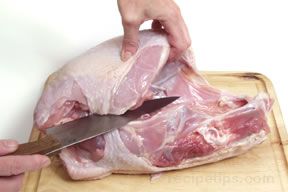 |
In order to remove the breast from the body cavity, cut along the rib cage from the the tail end to the neck on both sides of the bird. |
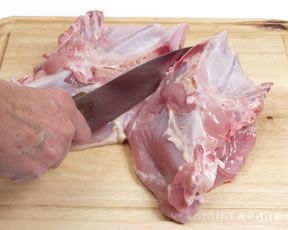 |
Place the breast upside down (skin side down) and cut along the breastbone through the bone and the meat, which will split the breast into halves. |
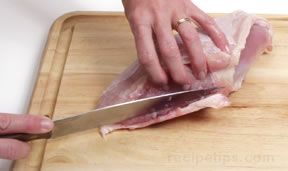 |
Cut the meat along the breastbone. |
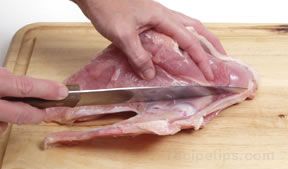 |
Cut along the edge of the wishbone and the keel bone. |
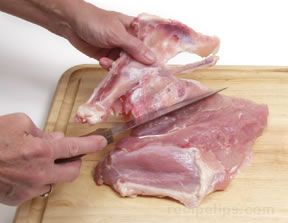 |
Cut along the ribs on one side of the breastbone using short, swiping cuts. |
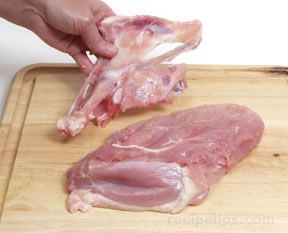 |
Remove the ribs from the breast half and save them for use in the soup or stock pot. |
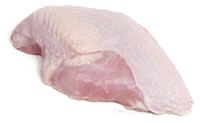 |
The boneless breast turned skin side up. |
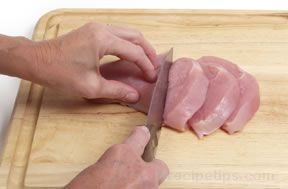 |
A boneless turkey breast can be cut across the grain to yield steaks that are ½ to 1 inch thick. Two of the steaks make an ample serving for one person. |
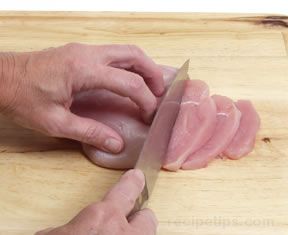 |
The breast can also be cut across the grain to produce cutlets, which are thinner than steaks and cook much more quickly. The cutlets can be pounded to make them even thinner and to tenderize them. The pounded cutlets can be sautéed and used for a number of recipes. |
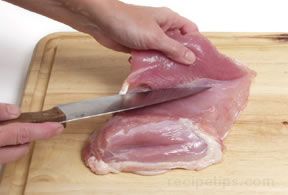
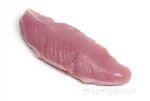
| Turkey tenderloins may be cut from each breast half. They are located on the inside of each breast half next to the keel bone. The tenderloin is a long cylindrically shaped muscle that is easily removed from the rest of the breast meat. The tendon in the middle of the tenderloin should be removed before cooking. Pull on the end of the tendon while making swiping cuts along the meat attached to the length of the tendon. |
 |
 |
 |
After removing the wings, legs, and breast, the remaining portion of the turkey carcass is the back. There is some meat and skin that can be removed, which can be ground or used in soups and casseroles. After the choice bits have been removed, the bones and any remaining meat can be used for stock. |
| The picture below shows the pieces obtained from cutting up a whole turkey. |
|
|
| Note: It is easier to cut up a whole turkey if it is not quite fully thawed. The muscle tissue will be slightly stiff, which allows for less effort in cutting. | |

