 |
How to Deep-Fry A Whole Turkey - Cooking Tips | ||||||||||||||||||||||||||||||||||||||||||||||||||||||||||||||||||||||||||||||||||||||||||||||||||||||||||||||||||||||||||||||||||||||||||||||||||||
| view article online: https://www.recipetips.com/kitchen-tips/t--1198/how-to-deepfry-a-whole-turkey.asp | ||||||||||||||||||||||||||||||||||||||||||||||||||||||||||||||||||||||||||||||||||||||||||||||||||||||||||||||||||||||||||||||||||||||||||||||||||||
Selecting and Measuring Oil | Preparing the Turkey
| ||||||||||||||||||||||||||||||||||||||||||||||||||||||||||||||||||||||||||||||||||||||||||||||||||||||||||||||||||||||||||||||||||||||||||||||||||||
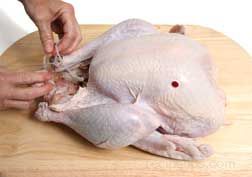 |
Remove the neck, giblets and any other packets from the cavity and clean the turkey the same as if you were preparing it for roasting. If the turkey has leg ties or a pop-up indicator inserted, they should also be removed. | |
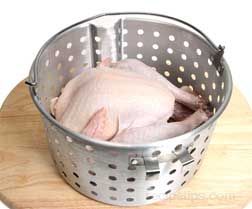 |
Place the turkey in the cooking basket or on the turkey stand, making sure the turkey is placed in the same manner it will be cooked, such as feet up on a stand or breast up in the basket. | |
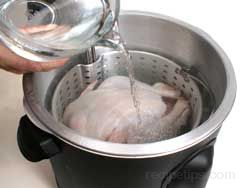 |
Place the turkey and basket into the pot and begin filling with water. | |
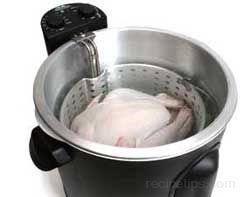 |
Add water until the turkey is totally immersed and there is 1 to 2 inches of water above the turkey. | |
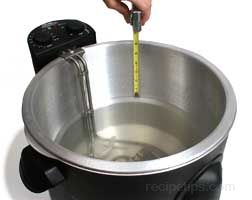 |
Remove the turkey from the pot and measure the distance from the top of the pot to the surface of the water. Be sure all the water was emptied from the cavity of the turkey when removed from the pot. When ready to start heating the oil, add the oil to the pot up to the same level where the water had been. |
Preparing the Turkey
|
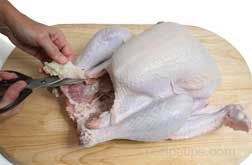
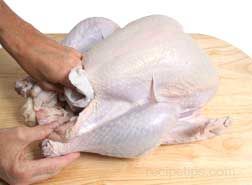
The neck, giblets and any other packet in the cavity should have been removed before measuring the oil. Be sure the turkey is completely thawed. Check cavity for ice crystals. Trim excess fat and anything from the cavity that is not desired. Rinse the turkey, paying close attention to the cavity. |
 | |
|
After rinsing, dry the turkey thoroughly. It is important to dry the turkey completely because any water that gets in the oil will cause the hot oil to splatter. Dry the turkey on the surface and in the cavity using paper towels. |
 | |
|
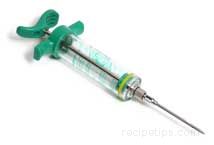
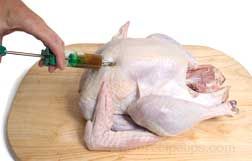
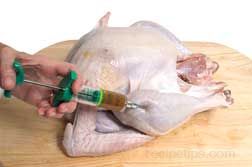
Season the turkey by using a rub, breading or injecting with marinade. Sometimes the turkey is only seasoned with a spice, such as cayenne pepper. The turkey can also be cooked without any additional seasoning or flavoring added. If injecting a marinade or flavoring, it should be spread throughout the turkey as much as possible with the least amount of punctures. For more information on how to inject a turkey, see Flavor Injecting Turkey. Inject 2 or 3 ounces in each breast and approximately 1 ounce in each leg and thigh. |
|
If you prefer to use a rub, there are many different seasonings, flavorings or a combination of both that can be used. For more information about using a rub to season the turkey, see Grilling with Marinades and Rubs. |
| Before placing the turkey in the basket or on the turkey stand for cooking, be sure to check the turkey again for moisture and pat dry if necessary. | 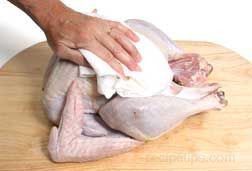 |
Deep-Frying the Turkey
Preparing the Cooker | Placing the Turkey in the Cooker | Deep-Frying the Turkey
Before you begin deep-frying your turkey it is a good idea to review all the safety tips below for preparing the cooker and cooking the turkey.
Preparing the Cooker
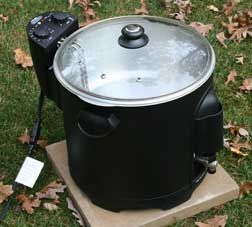 |
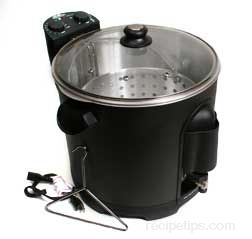
Select a location outside in a grassy or a dirt area that is level to place the cooker. Do not place on concrete because the splattering grease will stain it. Do not place on a wood deck because the wood could start on fire. If using an electric cooker and you must use an extension cord, be sure you select a spot where there will be no chance of someone catching the cord. | |
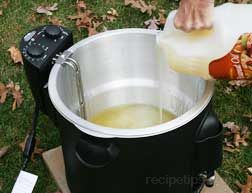 |
Begin filling the pot with oil. Used oil can be used if it is still good but always have some additional on hand because you may need more than what was left from the previous deep-frying. Do not mix different types of oil because they may have different smoke points, reducing the overall smoke point of the oil. | |
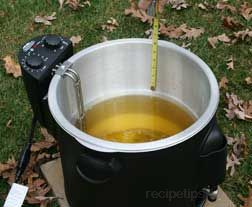 |
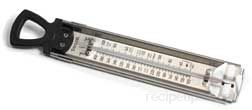
Fill the pot with oil to the point that was measured when determining how much oil to use as stated above. If using a propane gas cooker, be sure to have a candy/deep-fry thermometer attached to the side so that the end is in the oil at least 1 inch. | |
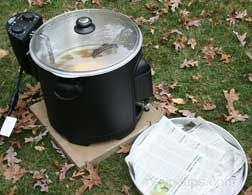 |
Prepare a large cookie sheet with newspapers or a thick layer of paper towels lining the bottom. Have this sitting close by the cooker for when the turkey is done so you can set the turkey in the basket or the stand on it to finish draining. | |
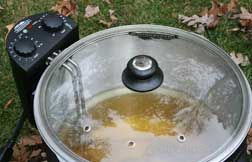 |
If using a propane gas cooker, turn the flame on but do not turn it all the way up. This will allow you to turn the flame up once the turkey is placed in the hot oil and the temperature of the oil drops. | |
It may take 20 t0 30 minutes for the oil to heat up properly. If using an electric cooker, it may take close to an hour before the oil is hot enough. | ||
NOTE: Once the cooker has been turned on, DO NOT leave it unattended. One person should not deep-fry the turkey by themselves. There should be at least two people around at all times. One person is needed to attend to the cooker and another to do the other tasks. Two people should help lift the turkey into the hot oil and remove it when it is done. | ||
Placing the Turkey in the Cooker
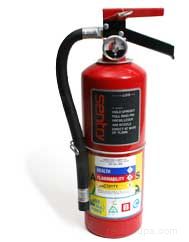
| Be sure to have a fire extinguisher within reach at all times when deep-frying. | 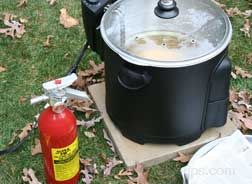 | |
|
The turkey should be placed in the basket horizontally with the breast up. If placing on a turkey stand the turkey should be placed vertically on the stand with its feet up. Check the turkey for moisture. If needed, use a paper towel again to dry the turkey off. |
 | |
If there is no basket or stand to hold the turkey, use a long heavy tool such as a clean fireplace poker to insert into the cavity of the turkey and then lift it carefully into the hot oil. Be careful that the turkey does not slip off the tool into the hot oil because that could cause the oil to splash out and cause harm to anyone standing nearby or to the cooker. | ||
|
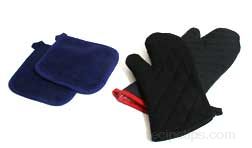
Check the oil temperature and when it has reached 375°F, it is ready for the turkey. Attach the lifting hook to the handle on the basket or to the loop on the turkey stand. Wearing long oven mitts to protect hands and arms lift the turkey up and place it in the hot grease. If necessary, use two people to lift the turkey carefully into the hot oil. |
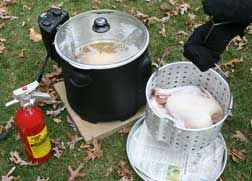 | |
| If using a propane gas cooker, you must turn off the burner while placing the turkey into the oil. Start lowering the turkey very slowly into the hot oil. | 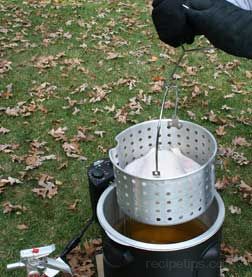 | |
| The oil will begin to bubble and splatter as the turkey is lowered into it. Be careful to watch the level of the oil as the turkey is lowered into the pot. Do not allow oil to overflow the edges. | 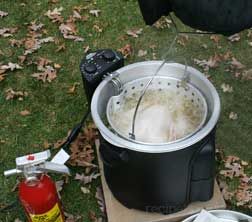 | |
| Continue to slowly lower the basket into the hot oil until it is completely immersed. Detach the lifting hook from the basket or stand. | 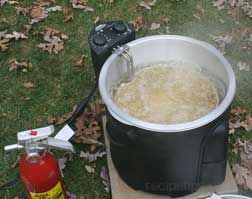 | |
| Once the turkey is placed in the oil, the temperature will drop. Adjust the heat so the temperature of the oil reaches 350°F for cooking the turkey. Heating the oil to 375°F to start with will allow the temperature to reach 350°F faster once the turkey has been placed in the oil. | 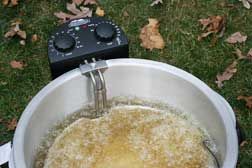 | |
| Place the cover on the cooker. The cover will help the oil come back to the proper temperature quicker and will protect against oil splatters. | 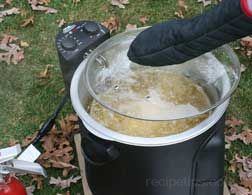 | |
It is important that the temperature of the oil is maintained at 350°F. Do not allow the temperature to drop below 325°F. If the oil is not hot enough the turkey will soak up the oil and not cook properly. If too hot it will burn on the outside before the inside is cooked thoroughly. Keep the temperature below 375°F. Many oils have a flash point of 425°F, which if reached, increases the risk of fire. |
Deep-Frying the Turkey
|
Once the temperature of the oil is back up to 325° to 350°F start timing the cooking process. Cooking time is figured at a rate of 3 minutes per pound plus 5 minutes. Be sure to monitor the temperature of the oil throughout the cooking time. Increasing or decreasing the heat when necessary. |
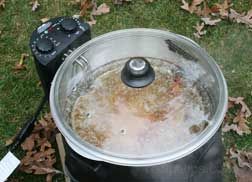 | |
| When the turkey is done it will have a nice browned outer surface and the turkey will float to the top. |  | |
|
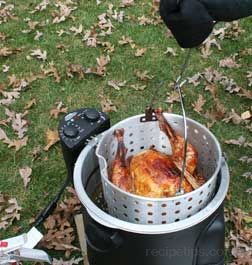
Wearing long oven mitts attach the lifting hook to the basket or the loop on the turkey stand and lift the turkey out of the hot oil. If necessary, use two people to lift the turkey out. Lift the turkey out of the oil and allow the oil to drain from the turkey while holding it over the pot. If working with a propane gas cooker, turn the burner off before removing the turkey. |
| |
| If using a basket with a drain clip, attach it to the edge of the pot and let the oil drain from the turkey. | 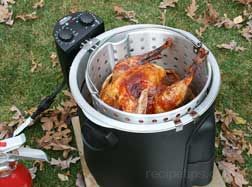 | |
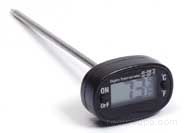
| Check the turkey for doneness using a meat thermometer. The breast should reach 170°F and the thigh should reach 180°F. If the turkey is not done, place back into the hot oil and cook for an additional 5 minutes. | 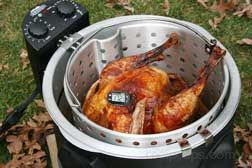 | |
| After draining the oil, place the basket or turkey stand in the cookie sheet that is lined with newspaper or paper towels. | 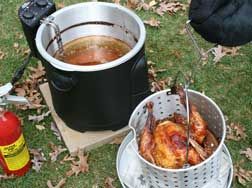 | |
| Wrap the turkey loosely with foil and allow it to rest for at least 15 minutes before carving it. This allows the juices to be reabsorbed back into the meat. | 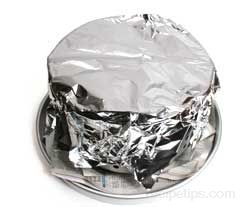 | |
| After the turkey has rested, remove it from the basket or turkey stand. It is then ready to be carved and served. |  |
Oil Care
Cleaning | Storing | Signs of Deterioration | Affecting Factors | Disposing of Oil
If the oil is cared for and stored properly, it can be used 3 or 4 times before being discarded. It must be cleaned after each use. Each time it is reused it may need to have additional new oil added to bring the oil level up to the proper level for frying.
Cleaning the Oil
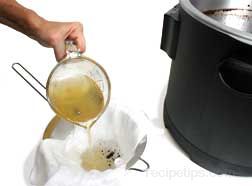 |
Allow the oil to cool completely before draining or removing from the cooker. When removing the oil from a cooker that does not have a drain value for draining the oil, the oil will have to be scooped out of the pot. Place a strainer in a large bowl and line it with cheesecloth. Scoop out the oil and pour into the cheesecloth lined strainer. If cheesecloth is not available a coffee filter or a couple of layers of paper towels can be used instead. | |
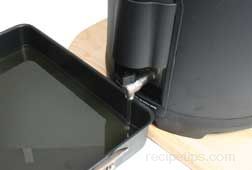 |
If the cooker has a drain valve, Use a pan to drain the oil. When the pan is partially full turn the valve off and pour the oil into a cheesecloth lined strainer that is place over a large bowl. | |
| The cheesecloth lined strainer will filter out all the particles form the oil, large and small. | 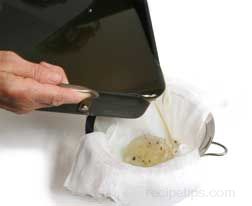 | |
| If the turkey has not been breaded or seasoned much before frying, the oil many not require filtering. Strain the oil through a strainer without the cheesecloth to strain out any large particles that accumulated during the cooking process. | 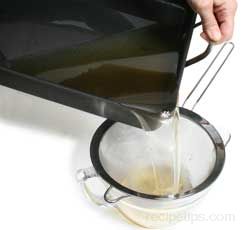 |
|
|
If the cooker has a drain valve, drain the oil down to the point where it will not drain through the valve any longer. The oil left in the cooker will contain most of the sediments from the oil and can be discarded. |
Storing the Oil
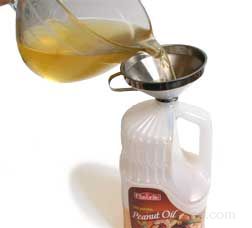 |
After the oil has been cleaned, pour it back into its original containers for storage. Using a funnel, carefully pour the oil back into the containers. Be sure the oil is completely cooled before pouring back into plastic containers. Also, do not place cover on the container or refrigerate unless completely cooled, otherwise moisture may build up inside the container and cause the oil to deteriorate more rapidly. | |
|
Note: When chilled the oil will thicken and become cloudy in appearance. When reheated, it will return to its normal consistency and color. | ||
Signs of Deterioration
There are several signs that indicate the oil is deteriorating. When any of these signs are recognized, the oil should be discarded. Some of the signs of deterioration are listed below.
- When the oil has a rancid smell or it begins to smell like the food that is cooked in it.
- The oil will darken more with each use but the darkening color does not necessarily indicate the oil is bad. When the oil has darkened and has a bad odor, it should be discarded.
- When the oil starts foaming on the surface.
- When the oil smokes excessively before it reaches 375°F.
- If the oil does not bubble when food is added.
Factors Affecting the Deterioration of the Oil
- The number of times the oil has been used.
- Exposure to heat, light, and oxygen.
- Overheating of the oil.
- Moisture absorbed by the oil.
- Impurities, such as food particles, seasonings, rubs, and salt.
- The combination of different types of oils reduces the quality by reducing the smoke point.
Disposing of Cooking Oil
If the oil shows any signs of deterioration, it should be properly disposed of and all new oil should be used. Listed below are suggestions on how to dispose of the used oil. Be sure oil has cooled before handling it.
- DO NOT THROW THE COOKING OIL DOWN THE DRAIN. Cooking oil poured down the drain will eventually cause problems with the plumbing.
- Pour the cooled oil into the original plastic jugs that it came in. You can also use plastic milk jugs. In many areas the jugs can then be thrown in the trash for general collection. Check with your local municipality to be sure this is acceptable.
- Some cities have a recycling program for cooking oil. Check with your city officials to see if this option is available in your area.
- The oil can be taken to a local landfill.
- Used cooking oil is biodegradable so it can be composted with other food scraps or if you have a garden or other area in your yard where a hole could be dug, you could bury the oil.
Deep-Frying Safety Tips
Extreme care is necessary to ensure safety when deep-frying a whole turkey. Because the required equipment can be cumbersome and the large quantity of hot oil necessary for cooking a whole bird can be dangerous, deep-frying a whole turkey is much less safe than deep-frying food on a smaller scale. It is important to note that Underwriters Laboratories has refused to certify any turkey deep-frying equipment because of the dangers involved. Listed below are some important points to consider when deep-frying turkey:
- Because of the size of the cooking equipment and the large quantity of oil required, deep-frying a whole turkey should never be attempted indoors. Pieces of turkey meat can be safely deep-fried indoors using traditional equipment such as a small pot on a stove top or a small deep-fat fryer.
- When purchasing a deep-fryer designed for cooking whole turkeys, make sure the model has a solid base that will hold the cooking pot firmly. Models with tripod legs should be avoided because they can easily tip.
- The pot must be large enough to accommodate the turkey, but not so large that it becomes wobbly on the heating surface.
- The deep-frying equipment should be used a safe distance from all combustible substances. Never place the cooker on a deck, near any building, or on a table. Be sure it is setting on a level surface. A level dirt or grassy surface would provide an area that you would not have to worry about stains from oil splatters.
- If using an electric cooker and you must use an extension cord, be sure you select a spot where there will be no chance of someone catching the cord. The extension cord should be as short as possible and be sure it is rated to handle the wattage of the cooker.
- Do not overfill the pot with oil. When the turkey is placed into the pot, the oil may spill over the sides and ignite the heating unit. Measure the amount of oil needed according to instructions above. When using a gas cooker, the burner should be turned off while the turkey is placed in the hot oil just in case the oil would overflow.
- Once the cooker is turn on to start heating the oil, do not attempt to move it and it should not be left unattended. Do not allow children and pets near the cooking area.
- A fire extinguisher and heavy potholders should always be within reach.
- The temperature of the oil should be closely watched. Once it reaches 450° F it will heats up very quickly to its flashpoint, which may cause the oil to ignite. Do not heat the oil above 375°F. If the oil begins to smoke, turn the cooker off immediately. If using a thermometer to check the temperature of the oil, be sure that it is working properly before using it.
- Be sure the turkey is completely thawed. If it is not completely thawed when it is inserted into the hot oil, it may cause the oil to spill over because of the reaction of the hot oil to the ice crystals in the frozen bird.
- Any utensils and equipment that come into contact with the hot oil must be thoroughly dried first. Moisture on the utensils will cause splattering when brought into contact with the hot oil, which can be dangerous.
- A long sleeved shirt and long heavy oven mitts should be worn to protect arms from the heat and splattering oil. Be sure to wear shoes to protect your feet.
- Make sure the turkey is as dry as possible before it enters the hot oil. Place the turkey into the hot oil slowly and carefully to prevent splashing or spilling the oil.
- After the cooking is completed, the oil should not be transferred to another container or disposed of until it has completely cooled. It is extremely dangerous to pour the oil from the cooking vessel until it has cooled. Several hours may be required for the large quantity of oil to cool properly.
Cooking Tips
- Do not add stuffing to the cavity of the turkey when deep-frying. The stuffing will not cook properly.
- Do not salt the turkey before deep-frying. The salt will draw out moisture to the turkey's surface, which will cause splattering when the turkey is placed in the hot oil. Salt the meat when you are ready to eat it.
- Remember to measure the amount of oil you will need by placing the turkey in the pot and covering with water before you marinate, bread or season the turkey, otherwise the flavoring agents will be washed off in the water.
- Be sure to maintain the proper cooking temperature of the oil. If it is not hot enough, the turkey will absorb the oil and be greasy. If it is too hot, surface will brown too quickly and the meat in the middle will not have had a chance to cook to its proper temperature.
- Do not overcook the turkey. If the oil maintains the proper temperature, 3 minutes per pound plus 5 minutes should be sufficient. If the turkey is cooked too long, the meat quickly becomes dried out.
- Heat the oil 10° to 15°F higher than the desired cooking temperature. This will help bring the oil back to the desired cooking temperature faster when the turkey is added and the temperature of the oil drops.
- Wash hands and utensils that are exposed to raw turkey through out the prep and cooking process to prevent cross contamination.
- Refrigerate leftover turkey within two hours of cooking.
