|
Knowing how to follow and read your recipe will help make your cooking or baking experience a success. Properly preparing your ingredients, using proper cooking times and temperatures, and proper bakeware or cookware all assist in the success of your end product.
Reading the Recipe
Before you begin cooking or baking, read the recipe completely through to the end. Read through the ingredient list and read all instructions. This will allow you to be prepared for any special steps that must be taken. Some of the recipe details that will affect the process, preparation and timing are listed below:
- Several of the ingredients may have to be prepared in a certain manner, such as melting or softening butter, melting chocolate, chopping and dicing of ingredients, precooking, or an ingredient may need to be precooked and then cooled before adding to other ingredients.
- A number of the ingredients may need to be added together and mixed or baked before other ingredients can be added. Such as the ingredients for a crust to a dessert may be mixed and baked before anything is produced with the other ingredients or parts of a salad may be mixed together and then require refrigeration overnight before other ingredients are added.
- Some ingredients need to be added quickly at a critical point in the process. Be sure these ingredients are measured and ready to add ahead of time.
- The ingredient list may indicate the entire amount needed for one ingredient but the instructions may indicate that a portion of the ingredient is used in one step and the remainder in another.
- Read the ingredient list and make sure you have all the necessary ingredients and the quantity required before you start. If you do not have an ingredient, check the Food Substitution chart to see if you have a substitution that would work in place of the original ingredient.
- Read the recipe carefully for any special indicators stated about doneness. Such as "cook until golden brown," or "bake until sides loosen from edge of pan." Use the cooking time stated as a guide to how long to cook but use the doneness indicators as a true sign of proper doneness. Some common doneness tests are shown below.

| Cookies: Cookies should be lightly browned and removed before they turn a dark brown around the bottom edge. If you want a softer cookie, they should be removed when the cookies look slightly underbaked. For softer cookies, start to check for doneness about 2 minutes before the suggested baking time. |
|
|
|
|
|
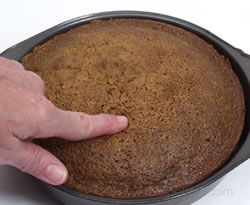
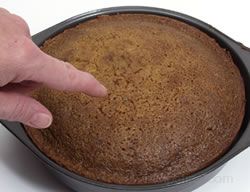
Cakes, Muffins and Quick Breads (Non-Yeast Leavened Breads): Press the center gently with one finger and feel for resistance from the baked item. The pressed spot should spring back, and if not, it needs more baking time.
|
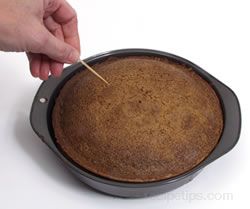
| A cake tester, skewer or toothpick inserted into the center should come out clean. If dough sticks to it, additional baking time is needed. |
|
|
 |
|
Breads: A visual test for doneness is to check the coloring of the loaf. It should be a nice golden brown color, not pale in color and not too dark. When the loaf is touched it should feel firm but not too hard. The best way to check doneness is to remove it from the pan, turn it over and tap on the underside. The loaf will have a hollow sound to it if it is properly baked.
|
| Pies and Pastries: The best way to check doneness for pies and pastries is to check coloring. When properly cooked, the crust of pies and pastries will have a lightly browned coloring. If not properly cooked, they will look pale in color and their texture will not be crisp and flaky as they are intended to be. |
|

|
|
Pasta: Tasting the pasta is probably the best way to determine doneness. Begin checking for doneness approximately 1 or 2 minutes before the suggested minimum time on the package. If it is not done, continue to check every 30 seconds until the pasta is done. When done, it will be tender but still have a slight bite to it. Cooking pasta to this point of doneness is called "al dente," which is Italian for "to the tooth". If the pasta is overcooked it becomes mushy. The pasta should be slightly undercooked if it is going to be added to another dish, expose to further cooking, or added to a hot soup.
|
|
Fish and Seafood: Fish and seafood must be watched carefully when cooking. Check for doneness in the thickest part of the fish. The meat should be an opaque color and should be starting to flake when tested with a fork. If the meat is already flaky it is overcooked. Remove the fish or seafood from the heat source when it is just beginning to flake because it will continue to cook for a minute or two once it is remove. This will prevent the fish from becoming overdone.
|
|
Meats, Vegetables, and Savory Dishes: Check for doneness according to the doneness indicators and cooking times stated in the recipe.
|
- Understand the proper way to measure a prepared ingredient. If the preparation method is stated after a comma, it is an indication that the ingredient should be measured and then prepared. If there is no comma, the ingredient should be prepared before it is measured. See examples below:

| As Stated In the Recipe |
Method of Preparation |
| 2 cups strawberries, coarsely chopped |
Measure 2 cups of whole strawberries and then chop |
| 2 cups coarsely chopped strawberries |
Measure 2 cups after the strawberries are chopped |
| 2 cups pasta shells, cooked |
Measure 2 cups of uncooked pasta and then cook |
| 2 cups cooked pasta shells |
Measure 2 cups of pasta after it is cooked |

- Be sure you have all the utensils and equipment necessary to produce the recipe as instructed. If you do not have the baking pan size suggested in the recipe, be sure to substitute an equivalent size. If you do not have the suggested cookware, be sure to substitute a similar type of cookware to satisfy the cooking method call for. See Types of Bakeware or Types of Cookware to assist you in selecting the proper substitutions.
- Have your recipe in a location that is convenient for you to read at all times so that you can see the ingredient list and the step by step instructions.
When reading through the instructions for your recipe, you will come across some terms that refer to the method you are to use for preparing the ingredients. You need to understand the terms to properly prepare the ingredients according to the recipe instructions. The most common terms are shown below.
 |
 |
|
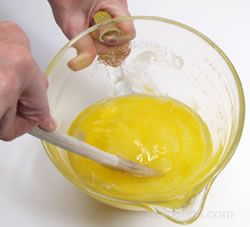
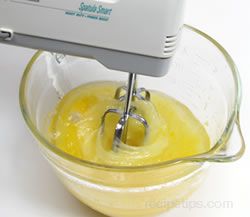
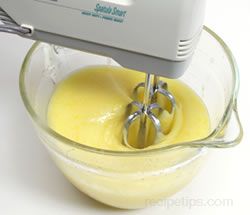
Beat: To mix ingredients together, using a rapid over and under motion rather than a circular motion, until mixture is smooth. Beating can be accomplished by hand, using a fork, spoon, whisk, or hand beater. An electric mixer can also be used to beat ingredients together. It takes approximately 100 hand strokes to equal one minute of beating with an electric mixer.
|
|
|
|
|
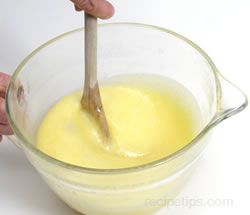
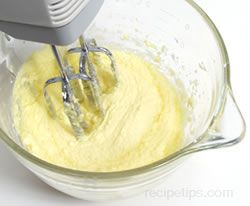
Blend: To mix ingredients together until they are very smooth. The ingredients can be blended by hand using a spoon, spatula, or whisk. The mixture can also be blended by using a hand mixer, blender, or food processor.
|
|
|
|
|
|
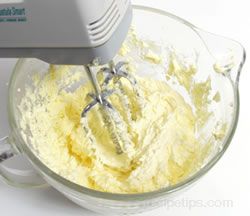
Cream: Mixing two or more ingredients, such as sugar, butter and eggs, together until they become creamy, smooth and fluffy. Creaming allows the butter to mix with the other ingredients more easily. The sugar crystals act as little beaters and help to add air to the creamed ingredients, producing a creamy, fluffy texture. The creaming generally involves the use of an electric mixer, but it can be done by whipping the ingredients vigorously with a balloon whisk. If the ingredients are creamed for too long the butter becomes too warm and it will begin to separate.
|
|
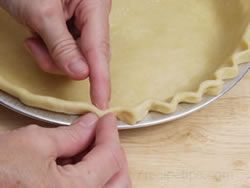
Crimping: A technique used to decorate the edge of a pie. When used on a double crust pie it also ensures that the top and bottom crust are sealed properly.
- With the thumb and index finger of one hand, pinch the outside edge of the crust while pressing from the inside with the index finger on the other hand. Repeat at 1/2" intervals.
|
|
|
|
|
|
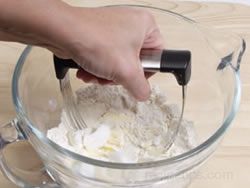
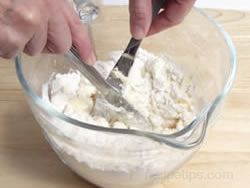
Cut In: To combine dry ingredients with shortening, butter or margarine by cutting the dry ingredients in with a pastry blender or two knives. As the dry ingredients are cut into the fat ingredients they begin to form clumps.
|
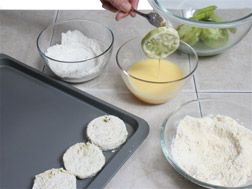
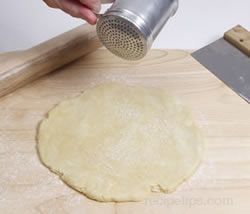
Dredge: To sprinkle dough, such as pie crust or pasta dough, with flour before rolling out. Generally the surface the dough will be rolled out on and the dough itself are lightly floured. The dough is dredged again whenever the dough begins to show signs of sticking while it is being rolled out. Dredging is also used to describe sprinkling cakes and other baked goods with granulated sugar or powdered sugar.
|
|
|
|
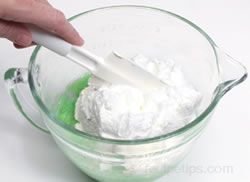
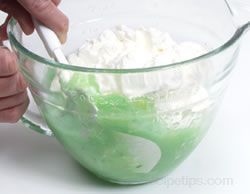
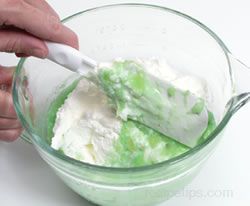
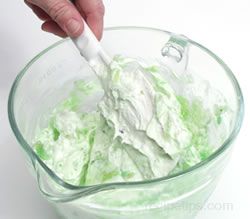
Fold: To combine a light ingredient, such as whipped cream, into a heavier mixture of ingredients. The light ingredient is gently combined with the heavier mixture by using a spoon or spatula to turn it over and into the heavier mixture.
- Cut down through the center of the ingredients.
|
|
|
- Bring the spatula across the bottom, over to the side, and back up.
|
|
|
- Fold over after coming up the side.
|
|
|
- Fold evenly by turning the bowl as you are working the mixture.
|
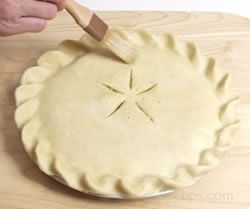
| Glazing: A glaze is applied to the surface of pastries and bread before they are baked to them a glossy finish. The glaze may consist of a sugar and water mixture, egg whites, or sometimes milk is used. |
|
|
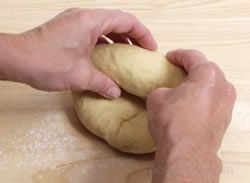
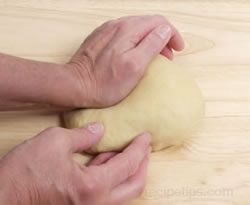
Kneading: The working of dough to develop the gluten in the flour, which allows the dough to hold its shape as it rises.
|
- Place the dough on a lightly floured surface and knead the dough by pressing on it with the heel of your hands, pushing it away from you.
|

|
- Fold the dough back over towards you and repeat the kneading process. Continue to knead the dough in this manner. Turn the dough a little each time you knead it. If the dough is sticky, sprinkle it with flour as you are kneading.
|
|
- Knead until dough is smooth and elastic. This process may take anywhere from 5 to 20 minutes.
|
|
|
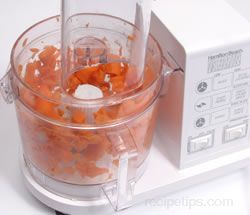
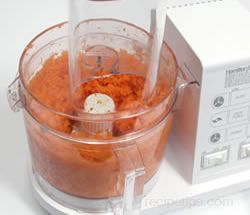
Mix: To combine two or more ingredients, using any method that blends them together evenly.
|
|
|
|
|
Process: When an ingredient is chopped, grated, blended, or liquefied by the use of a blender or food processor.
|
|
Puree: To process a food until it has a thick and smooth, liquefied consistency. It is processed by the use of a blender or by forcing the food through a sieve.
|
|
|
|
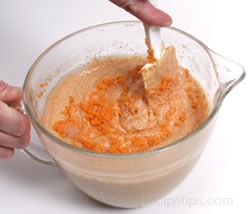
Stir: Combing ingredients until well blended by making a circular motion through the mixture using a whisk, spatula, spoon, or fork. Stirring does not generally need to be done vigorously or for a long period of time. Stirred just long enough to blend the ingredients evenly. |
|
|
|
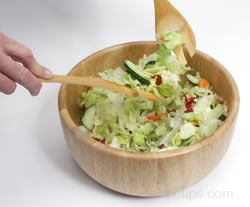
Toss: Mixing ingredients, such as lettuce and other salad greens, by using two utensils to gently lift and drop several times until the ingredients are well mixed.
|
|
|
|
|
|
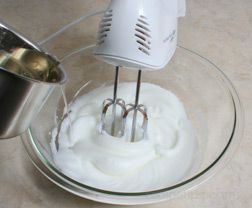
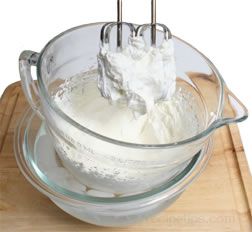
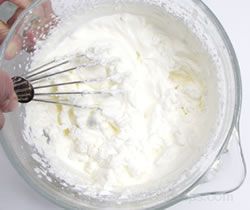
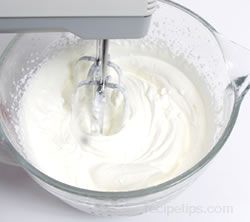
Whip: To add air to a mixture by rapidly beating the ingredients together with a whisk, hand beater or electric beater. Whipping a mixture will produce a light and fluffy texture and increases its volume.
|
|

|
|
Whisk: To blend ingredients and add volume to the mixture by the use of a whisk, a wire looped utensil. |
Ingredient Preparation
Preparing the ingredients properly for your recipe will help you be more organized, resulting in less errors and increased efficiencies. Shown below are some preparation guidelines to follow and suggestions on how to make your cooking or baking experience go smoothly.
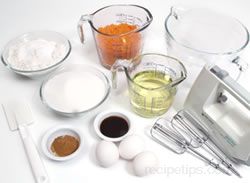
- Make sure you have all the ingredients called for in the recipe. The best way to ensure that you have what you need to complete the recipe is to measure out all the ingredients before you start to mix them together. This will prevent you from getting part way through the combining of ingredients and then discover you don't have enough of one of the ingredients. Also, be sure that you have all the equipment necessary to complete the recipe before you start.
|
|
 |
|
- Prepare the ingredients in the manner suggested by the recipe. Do the chopping, slicing, grating, sifting or other preparation as instructed by the recipe. Be sure that you read the recipe carefully and that you understand the instructions for preparing the ingredients. A guideline to follow is that any preparation description that follows a comma is to be performed after the ingredient is measured. When the description comes before the ingredient name, the preparation is performed before the ingredient is measured. Example: "¼ cup of pecans, chopped" indicates that you should measure out ¼ cup of pecans and then chop them. "¼ cup of chopped pecans" indicates that you should chop the nuts and then measure ¼ cup of the chopped nuts.
- If your recipe requires a large quantity of an ingredient that is to be added in small amounts at a time, measure the full amount out all at once and put in a bowl. Then take from the measured out ingredient when you have to add in smaller amounts. If you loose track of what you have added along the way, this will ensure that you put in the correct amount called for in the recipe.
- If the recipe calls for softened butter or margarine, be sure that you have remove it from the refrigerator ahead of time to allow sufficient time for it to soften properly. Cream cheese is another ingredient that needs to be brought to room temperature if you are required to beat it for the recipe.
Many ingredients are required to be prepared in some manner in different recipes. Shown below are some common ingredients and tips on preparing them.
Butter or margarine: Generally if butter or margarine is to be mixed with other ingredients, particularly when baking, it needs to be softened or melted.
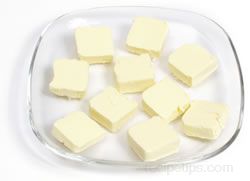
| The best way to soften butter or margarine is to remove it from the refrigerator and allow it to become room temperature. To speed up this process, cut it into tablespoon size slices and place on a plate or in a bowl to soften. |
|
|
To speed it up further, set the plate on or wrap the bowl with a warm, damp towel. It can also be softened in the microwave but it is difficult to soften without melting it. To soften in the microwave, use a medium to low setting (about 30% power) and only microwave for a short time, 10 to 15 seconds. Check to see if the butter or margarine is softened sufficiently, if not, microwave again for 5 or 10 seconds and check again. If the butter or margarine begins to melt, it can still be used in many instances but it may affect the texture of the end product.
|
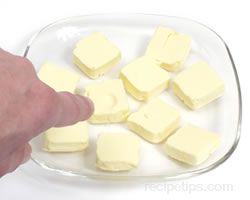
| Butter or margarine is softened properly if it gives slightly when pressed but does not crack or separate. |
|
|
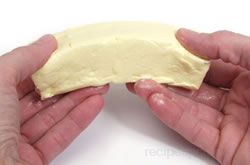
| You can also check softness by bending a stick of butter or margarine. It should give slightly without cracking. |
|
 |
Butter and margarine can be melted on the stovetop or in the microwave. In a small saucepan, on the stovetop, heat the butter or margarine over medium heat until melted. Watch carefully so that it does not burn. To melt in the microwave, cut the butter or margarine into tablespoon size slices and place in a microwave save bowl. Microwave on high for approximately 30 seconds for 2 to 3 tablespoons and 40 to 45 seconds for ¼ cup. Cover the bowl with wax paper when melting to prevent butter or margarine from splattering the inside of the microwave.
Dotting Butter - Butter is sometimes required to be used when it is cold to allow it to be applied properly, such as in dotting butter on a pie filling or fillings for other foods. When dotting butter, the cold butter is rubbed over a coarse grater and distributed evenly over the top of the filling.
Cream Cheese: To soften cream cheese, unwrap and place in a microwave safe bowl. Microwave at a medium to low setting (30% power) for approximately 1 minute for a 3-ounce bar.
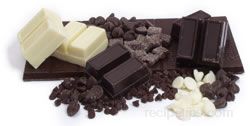
Chocolate: Melting chocolate so that it is creamy and smooth can be a challenge at times. It is important to not let the chocolate get exposed to any moisture. The moisture will cause the chocolate to become stiff and coarse, rather than creamy and smooth. Make sure any pans, bowls, or utensils that come in contact with the chocolate are completely dry. Just a couple of drops of water can cause the chocolate to tighten. Steam, condensation, and even the humidity in the air can cause a problem. Chocolate can be melted using one of the methods shown below.
In a saucepan on top of the stove: Break the chocolate up into small pieces and place in a heavy saucepan. Heat over low heat until melted. Stir frequently while melting to prevent scorching. If scorching does begin to occur, turn the heat down on the stove.
Double boiler: Place the chocolate in the top pot of the double boiler and heat. Have the water in the bottom pot hot but not boiling. Be careful that steam or other moisture does not come in contact this the chocolate. Stir occasionally through out the melting time.
Warm water: Place the chocolate in a heatproof bowl or cup and then place the container in a shallow pan containing hot water and allow it to sit until the chocolate has melted. Stir occasionally.
Microwave: Break the chocolate up into small pieces and place in a microwave safe dish. Microwave on high for 1 to 1 ½ minutes for 3 to 4 oz. of chocolate and 1 ½ to 2 minutes for 6 oz. Check to see if all the pieces are melted. The chocolate may hold its shape but once it is stirred you will be able to tell if additional time is required. If not completely melted, microwave for 20 to 30 additional seconds and check again.
To successfully melt chocolate to a creamy and smooth texture, be sure water, steam, condensation, or humidity does not come in contact with the chocolate. If the chocolate does begin to stiffen as you are melting it, you can try to correct it by adding 1 tablespoon of solid vegetable shortening for each 6 ounces of chocolate that you are melting. Do not use butter, margarine, spreads or other products containing water.
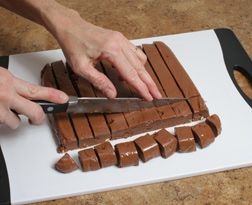
Caramels: Remove wrappers and place in a heavy saucepan. Melt caramels over low heat, stirring constantly as they are melting. Many recipes have other ingredients, such as evaporated milk, milk, butter, or margarine, added to the caramels as they are melted. These ingredients will give the melted caramels a slightly thinner consistency.
To melt caramels in the microwave, place the unwrapped caramels in a microwave safe bowl and microwave on high for 30-second intervals. Check and stir the caramels after 30 seconds, if not thoroughly melted, continue to microwave at 30-second intervals until all the caramels are melted.
Coconut - Toasted: Spread the coconut in an even layer on a shallow baking pan and place in an oven heated to 350°. Toast until lightly browned, approximately 5 to 10 minutes, watch carefully. Shake or stir frequently for even browning.
Toast in the microwave by placing the coconut in a microwave safe bowl and microwaving on high for 30-second intervals. Stir and continue to microwave for 30-second intervals until the coconut is lightly browned.
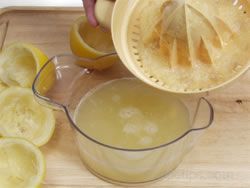
Lemons: To get juice from your lemons, microwave for 15 seconds before squeezing the juice out.
Fresh Herbs: When you need to chop fresh herbs, hold a small bunch with your fingers and use a scissors to snip into fine pieces. The herbs will be fluffier and nicer cut than if you try chopping with a knife. Chopping with a knife has a tendency to tear and bruise the herbs when they are fresh.
Pepper: To get the best flavor from your pepper, crush the peppercorns just before you are ready to use it.
Garlic: The skins from cloves of garlic can be removed by placing the clove on a hard surface, such as a cutting board and then press down on the clove with the flat side of a large knife. The skins should break loose and be easy to remove. Another technique that works well is to heat the cloves in the microwave for 15 seconds. Remove the cloves from the microwave and the skins should peel right off. For more information on garlic, see All About Garlic.
Vegetables: Slice, chop or grate vegetables ahead of time so they are ready when it is time to add them to the recipe. If you have a lot to process, you can save time by using a food processor. For more information on how to prepare vegetables, see All About Vegetables.
Pasta: When cooking pasta to be added to another dish that requires additional cooking, you should undercook the pasta. The pasta will finish cooking when it is cooked with the rest of the ingredients in the dish. If the pasta is thoroughly cooked before adding it to the other ingredients, it may become overcooked and mushy when cooked in the finished dish.
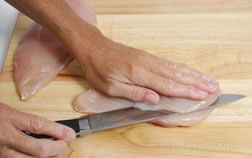
Meat Cut in Strips or Cubes: If a recipe calls for raw meat that is to be cut into strips or cubes, place the meat in the freezer for approximately 1 hr., just long enough for it to be partially frozen, or if it is already frozen, do not allow it to completely thaw. Cutting the raw meat into strips or cubes while it is still partially frozen will make the cutting a lot easier.
Chicken Breasts: Precook chicken breasts and store in the freezer for future use. This will cut down on your preparation time when making a recipe that calls for cooked chicken. Be sure to take it from the freezer and thaw in the refrigerator before you are ready to add it to your recipe.
Fresh Eggs: The freshness of eggs can be determined by a simple test. Fill a pan with cool water and add salt. Add an egg to the water. If the egg sinks it is fresh. If the egg floats to the top, it should be discarded.
Refrigerated Foods: When preparing ingredients ahead of time, be sure to return any items that need refrigeration back to the refrigerator once you are finished with the prep work for that ingredient. Scaling Your Recipe
Most recipes can be scaled to increase or decrease the amount you are making of an item. There are guidelines that you should follow to be successful when scaling recipes. Recipes for some food items scale more successfully than others. Scaling will affect the ingredients you use, the pan size, the cooking temperature and cooking time. Shown below are some guidelines that will help you to succeed in scaling your recipes.
Scaling
When scaling your recipe, try to stick to increasing or decreasing it by an even number. This will help the ingredient amounts be closer to standard measurements. You can scale proportionately but you may end up with uncommon measurements, making it harder to get the amounts measured accurately. If you have a 6 serving recipe and you want to scale it for 10 servings, you would take the quantity you are scaling to and divide it by the original serving size to get your conversion factor. The ingredient measurements are the multiplied by the conversion factor to get the scaled quantity to use.
Scaling Examples:
|
Scaling - Proportionately
10 servings / 6 servings = 1.667 conversion factor |
|
If the original recipe called for 2/3 cups of sugar,
the 10 servings would require 1.112 cups.
2/3 cups of sugar x 1.667 conversion factor = 1.112 cups |
|
Scaling - By Doubling the Servings
12 servings / 6 servings = 2.0 conversion factor |
|
If the original recipe called for 2/3 cups of sugar,
the 12 servings would require 1 1/3 cups.
2/3 cups of sugar x 2.0 conversion factor = 1 1/3 cups
(The 1 1/3 cups will be easier to measure with accuracy than the 1.112 cups) |
When scaling a recipe, be sure to write the scaled measurements in a column next to the original amounts or rewrite the recipe so that you do not forget to scale one of the ingredients when you are measuring them. The chart below shows the half scaled measurement and the double-scaled measurement of some common measurements.
|
Scaled Measurements |
| Original Measurement |
Half Scaled |
Double Scaled |
1/8 tsp.
|
Dash or Pinch |
1/4 tsp. |
| 1/4 tsp. |
1/8 tsp. |
1/2 tsp. |
| 1/2 tsp. |
1/4 tsp. |
1 tsp. |
1 tsp.
|
1/2 tsp.
|
2 tsp. |
| 1 1/4 tsp. |
5/8 tsp. |
2 1/2 tsp. |
| 1 1/2 tsp. |
3/4 tsp. |
3 tsp. (1 tbsp.) |
1 3/4 tsp.
|
7/8 tsp.
|
3 1/2 tsp. |
| 2 tsp. |
1 tsp. |
4 tsp. |
| 2 1/2 tsp. |
1 1/4 tsp. |
5 tsp. |
1 tbsp.
|
1 1/2 tsp. (1/2 tbsp.)
|
2 tbsp. |
| 1 1/2 tbsp. |
1 1/4 tsp. |
3 tbsp. |
| 2 tbsp. (1/8 cup) |
1 tbsp. |
1/4 cup |
| 3 tbsp. |
1 1/2 tbsp. (4 1/2 tsp.) |
6 tbsp. |
| 4 tbsp. (1/4 cup, or 2 fl. oz.) |
2 tbsp |
1/2 cup |
| 1/3 cup |
2 tbsp. + 2 tsp. |
2/3 cup |
1/2 cup (4 fl. oz.)
|
1/4 cup |
1 cup |
| 2/3 cup |
1/3 cup |
1 1/3 cups |
| 3/4 cup |
3 tbsp. |
1 1/2 cups |
1 cup (1/2 pint)
|
1/2 cup |
2 cups |
| 1 1/4 cups |
1/2 cup + 2 tbsp. |
2 1/2 cups |
| 1 1/3 cups |
10 Tbsp. + 2 tsp. |
2 2/3 cups |
1 1/2 cups
|
3/4 cup |
3 cups |
| 1 2/3 cups |
1/2 cup + 1/3 cup |
3 1/3 cups |
| 1 3/4 cups |
3/4 cup + 2 Tbsp. |
3 1/2 cups |
2 cups (1 pint)
|
1 cup |
4 cups (1 quart) |
| 2 1/2 cups |
1 1/4 cups |
5 cups |
| 3 cups (1 1/2 pints) |
1 1/2 cups |
6 cups (1 1/2 quarts) |
| 3 1/2 cups |
1 3/4 cups
|
7 cups |
| 4 cups (2 pints, or 1 quart) |
2 cups (1 pint) |
8 cups (1/2 gal.) |
| 4 1/2 cups |
2 1/4 cups |
9 cups |
5 cups (1 1/4 quarts)
|
2 1/2 cups |
10 cups (2 1/2 quarts) |
| 5 1/2 cups |
2 3/4 cups |
11 cups |
| 6 cups (1 1/2 quarts) |
3 cups (1 1/2 pints) |
12 cups (3 quarts) |
7 cups (1 3/4 quarts)
|
3 1/2 cups |
14 cups |
| 8 cups (2 quarts, or 1/2 gal.) |
4 cups (1 quart) |
1 gal. |
| 10 cups (2 1/2 quarts) |
5 cups |
5 quarts |
| 3 quarts (3/4 gal.) |
6 cups (1 1/2 quarts) |
1 1/2 gal. |
14 cups (3 1/2 quarts)
|
7 cups |
7 quarts |
1 gal.
|
1/2 gal. |
2 gal. |
| 2 gal. |
1 gal. |
4 gal. |
Ingredients
When cooking savory dishes, such as casseroles, soups, stews, pasta, rice and meats, most ingredients can be increased or decreased according to the conversion factor but there are some exceptions. The seasonings, such as salt, pepper, herbs and spices, should be added according to taste. If you are doubling a recipe that calls for 1 tsp. of salt, start by adding 1 ½ tsp. If tripling the recipe, add 2 tsp. of salt and when halving a recipe use 1/3 tsp. of salt. For recipes that can be tasted as you are making them, you can always add more seasoning if necessary but for recipes that will have to be completely cooked before you can taste them, you will just have to experiment by trying the converted amount and adjust accordingly the next time you make the recipe.
When baking, the success of the recipe depends more on the precise quantity of ingredients. Ingredients, such as flour, sugar, baking soda, baking powder and yeast are not recommended for scaling. If you want to double a recipe that contains these ingredients, it is best to do it by making two separate batches.
Eggs should be scaled with caution. When making a dish, such as omelets, where eggs are the major ingredients, doubling a recipe may cause the eggs to have to cook too long, which may result in rubbery eggs. It is better to cook in separate batches to avoid this problem. Scrambled eggs could be doubled if a larger pan is used and they can be cooked on a burner that will provide even heat for the larger size pan.
Pan Size
Scaling a recipe will generally mean adjusting the pan size you will use. When reducing, a smaller pan should be used and when increasing a recipe, a larger pan will need to be used. When selecting a pan for the scaled recipe, select one that will keep the depth of the ingredients approximately the same as the original recipe. See Types of Bakeware or Types of Cookware for more information on selecting the best pan size for the scaling of your recipe.
Cooking Time and Temperature
When scaling a recipe, you will generally have to adjust the cooking time, cooking temperature or both. Reducing the recipe will mean you are cooking less in a pan and will generally have to reduce the cooking time and possibly the cooking temperature so that the food does not overcook. Increasing the recipe may require increased cooking time and temperature, or depending on what you are cooking, one may need to be increased and one decreased. Shown below are some examples of when and how the time and temperatures may need to be adjusted.
Sautéing and Frying: When decreasing the amount you are cooking, decrease the cooking time so that the food does not overcook. You may have to use a smaller pan and reduce the temperature also.
When increasing the amount you are cooking, use a pan with a larger cooking surface so that all ingredients will be exposed to the heat evenly. Be sure the pan fits the burner size so that it will be heated evenly. The ingredients must not be too crowded in the pan or steaming may occur, preventing the food from cooking properly. If overcrowding is problem, cook in smaller batches.
When adding oil to the pan before cooking, do not increase the amount of oil. Start with the same amount as for a single batch and add more if needed.
Soups, Stew, and Sauces: When increasing or decreasing, try to keep the depth of the ingredients the same depth as the single recipe. If you have to use a pan that causes the depth to vary from the original, adjust cooking times and temperatures as shown below:
Deeper Depth - Increase cooking time and if the dish contains a lot of liquid, decrease the amount of liquid by a small amount.
Shallower Depth - Decrease the cooking time and if the dish contains a lot of liquid, increase the liquid ingredients slightly.
Baked Goods / Dishes: When increasing or decreasing baked goods or baked dishes, try to use a pan size that will hold the ingredients at the same depth as the original size. If the depth varies, adjust the baking time according to the suggestions shown below:
Deeper Depth - Increase the cooking time and slightly decrease the temperature.
Shallower Depth - Decrease the cooking time and slightly increase the temperature.
Same Depth / Two Dishes - When doubling a recipe by making two separate batches to bake at the same time, allow a little more cooking time and increase the cooking temperature by 25°. Place the pans on the same rack with even spacing between the pans and the sides of the oven. If placed on two racks, switch positions and turn them one half of a turn (180°) when the cooking time is just a little over half.
Cookies: Cookies can generally be halved or doubled with few problems. If you double a recipe for cookies and are going to bake with two cookie sheets at the same time, one on the top rack and one on the bottom rack, you should alternate the sheets half way through the cooking time. It may be necessary to increase the cooking time and slightly decrease the temperature. If you end up with a partially full cookie sheet at the end of a batch, try to make sure there are no big voids between the cookies. If there is too much void space, they can overheat and burn.
Because adjusting the cooking time and temperature for a recipe that has been scaled can be uncertain, it is important to use the visual descriptions or the internal temperature readings given by the recipe to determine doneness.
There are some recipes that do not scale well. Foods like cakes, breads, pies and soufflés have ingredients that are critical to be proportioned as specified in the recipe and baking temperatures and times that are critical to the success of the end product. If you are going to need foods of this type in two or three times the amount, it will be best to mix three separate batches and bake them separately. If you only need half the amount, make a full recipe and enjoy the leftovers.
In scaling a recipe it is best to avoid increasing or decreasing it by more than four times. Some cooks even advise to not scale more than two times. Even though a recipe can be scaled by a larger multiple, you will have better success if you stay within these boundaries. |


