|
Preparing a Cake Board | Assembling a Layer Cake | How to Frost a Cake without Crumbs
Preparing a Cake Board
| Begin by deciding what you are going to place the cake on for decorating. You can use a cake board, a cake plate, or any large flat platter that is the appropriate size. You may need to use a cake board if you don't have a plate or platter large enough or if you don't want to worry about getting the plate back once the cake is gone. The instructions below will show you step-by-step how to cover a cake board. Cake boards can also be purchased wherever cake decorating supplies are sold if you do not want to make your own. |
|

Rectangle Cake Board
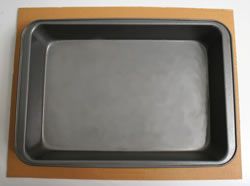
- Use heavy cardboard and cut it so that it will be at least 2 inches larger than the cake on all sides, or if you have a cutting board that is large enough, you could use that.
|
|
 |
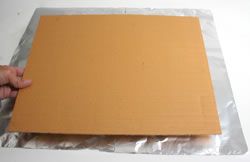
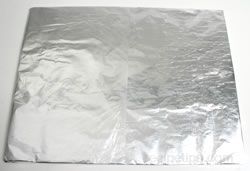
- Cover the board with foil, heavy coated wrapping paper, or cloth. You can use whatever you feel will look good with the cake.
- Cut the material to the appropriate size, making it approximately 2 inches larger than the board so there will be a sufficient amount to wrap around the edges. You may have to cut two pieces to make it large enough for your board.
|
|
 |
- Once you have the material cut, lay it face down on your work surface. Place the board in the center of the material and begin taping the edges to the back of the board.
|
|
 |
- Fold the sides of the material up neatly around the edges, making sure it is wrapped tightly and then secure it with tape. Be sure the corners and edges are taped down securely.
|
|
 |
|
|
|
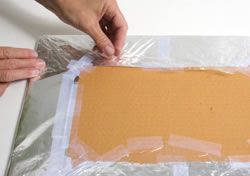
- After the board has been covered, it should be wrapped in plastic to protect the covering and to protect the cake from being exposed to any unsafe materials. Cover the board with plastic wrap in the same manner as you applied the cover material.
|
|
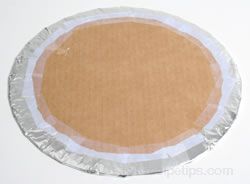
Round Cake Board
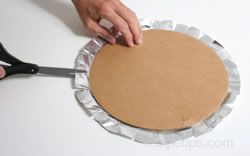
- When covering a round cake board cut the material so that it is 1 to 2 inches larger than the board itself. Lay the material face down and place the cake board centered on the material. Begin cutting slits from the edge of the material to the edge of the board, making them at about 1 to 1 1/2 inch intervals all around the board.
|
|
 |
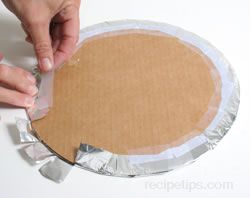
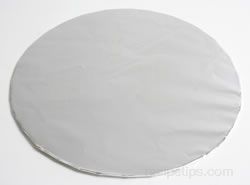
- Start folding the slits over the edge one at a time and then securing them with tape once you have a few folded over.
|
|
 |
|
|
|
- Continue all around the board until all the slits are taped down securely. Once the material is taped to the board it should be covered in plastic in the same manner as shown above for the rectangle cake board.
|
Assembling a Layer Cake
Assembling | Layer Placement | Filling Tip
Before you begin assembling the cake, be sure it has been prepared properly. See Cake Preparation to see the steps that should be taken to ensure the cake is ready for assembling, frosting, and decorating.
Assembling the Layers
Be sure the cake layers have had the crumbs brushed off in preparation before starting the assembling process. |
|
|
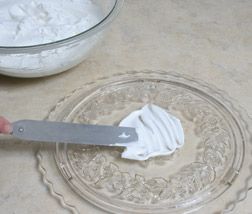
- Begin assembling by placing approximately one tablespoon of frosting in the center of the cake plate or board; spread it out slightly.
- This small amount of frosting will help hold the cake in place on the plate or board.
|
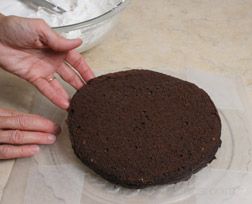
- Select the layer that is the thickest and most even to be the bottom layer. Place the first layer of the cake bottom side down on the plate or board, making sure to center it as evenly as possible. Gently press the layer down so that it adheres to the frosting.
|
 |
|
- Protect the plate or board with wax paper before adding the next layer or frosting the cake. The wax paper will catch the crumbs or other spills that may occur while working with the cake and will help keep the cake plate or board clean.
- Cut 4 pieces of wax paper and slide them under the cake on four sides. Slide under just far enough so that the plate or board will be protected on all sides of the cake.
|
|
|
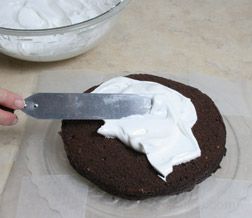
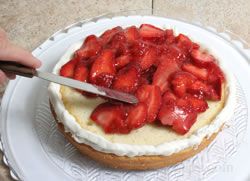
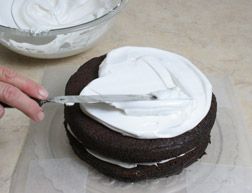
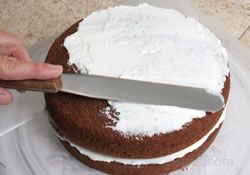
- Add the filling on top of the first layer and spread out evenly, keeping it about 1/4 inch from the edge to allow for some spread once the next layers are placed on top.
|
- Be sure to work with a sufficient amount of frosting when spread it on the cake. This will help prevent the blade of the spatula from touching the cake and picking up crumbs that will get into the frosting. If necessary, the excess frosting can be removed once the cake is covered.
- When first spreading the frosting, push it around and do not make a backwards motion. Once the cake is covered you can spread the frosting back and forth without picking up crumbs.
|
 |
|
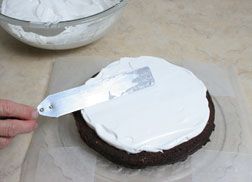
- The filling should be about 1/4 inch thick. Level the filling off so that the next layer will have a flat surface to be placed on. Some areas of the filling may be thicker than others when trying to get the filling level.
|
|
|
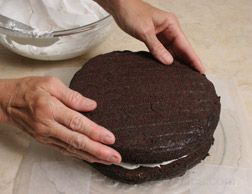
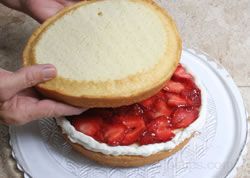
- Place the next layer on top of the filling so it is centered over the first layer. See the note below on layer placement.
- Place the top layer on the cake with the bottom side up. This will provide a flat surface without many crumbs.
|
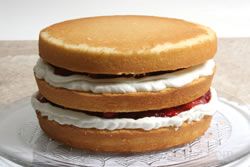
- Check to see if the top layer is level. If it is slightly unlevel, press it down a little more in the high areas. If the top layer is too unlevel, you can add a little frosting between the layers in the area that needs to be built up.
|
Layer Placement
There are a couple of details to keep in mind when placing two or more layers on top of one another. Take the following information into consideration when layering the cake.
- Generally the bottom layer should be placed bottom side down and the top layer should be bottom side up. This starts the cake off flat and provides a flat surface for the top.
- If the layered cake has layers in between the top and bottom, they should generally be placed bottom side down so that a level surface is being place on the leveled filing.
- If the cake baked with a flat top it will not matter which direction they are turned when place on the layers but many times the layers will bake with at least a slightly domed top and should be leveled as shown in Cake Preparation.
- Even though a leveled cake will have a flat top, it should not be used as the top layer because of the open crumb. This will make it more difficult to keep the crumbs out of the frosting.
- As layers are being added, check for levelness as each layer is added. Adjust by adding more filling in areas when needed or by turning the layers to match a thick side of one layer with the thin side of another layer.
- Make the necessary adjustments as you go so the cake is as level as possible. When you get to the top layer, place it bottom side up and level the top by adding frosting in the low areas until the top is leveled out.
|
Filling Tip
|
 |
|
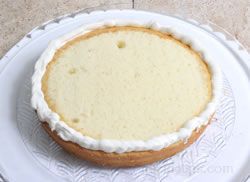
- If you are working with cake filling recipes that have a softer or juicier consistency, create a dam of frosting on top of the layer around the outer edges of the cake.
- The dam of frosting will help hold the filling in between the layers and keep it from bleeding through to the outer frosting layer.
|
 |
|
- Carefully add the filling inside the dam of frosting and spread out evenly.
|
 |
|
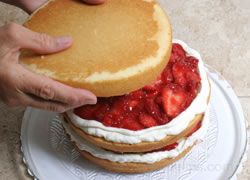
- Place the next layer on top of the filling and continue to fill any additional layers in the same manner.
|
 |
|
- Add the top layer, placing the cake bottom side up to create a flat top.
|
|
|
|
 |
How to Frost a Cake without Crumbs
Without a Crumb Coating | Using a Crumb Coating | Removing Wax Paper
Frosting a Cake without a Crumb Coating
It is important to work with a sufficient amount of frosting when you are frosting a cake without a crumb coating. This will help prevent touching the cake with the spatula and picking up crumbs that will get into the frosting. If necessary, the excess frosting can be removed once the cake is covered.
- When first spreading the frosting on the top and sides, push it around and do not make a backwards motion. The backwards motion will cause the crumbs to pick up off the cake and get mixed into the frosting. Once the cake is covered you can spread the frosting back and forth without picking up crumbs.
|
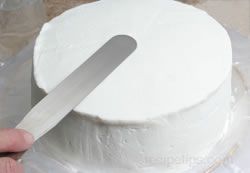
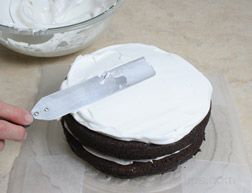
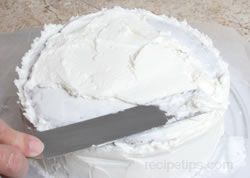
- Once the cake is level, frost the top in the same manner as the middle layer was frosted. The frosting on top can also be used to help level the cake.
|
|
|
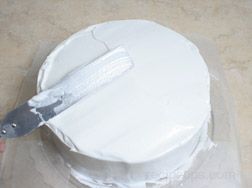
- Smooth and level the top the best you can. A spatula that is as long as the cake is wide will help make it easier to smooth and level. If you don't have one that long you will have to make several swipes across the cake to make it as smooth and level as possible.
|
|
 |
 |
|
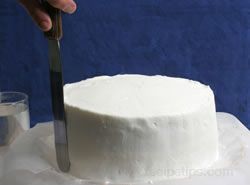
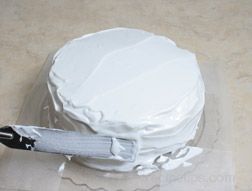
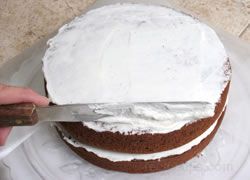
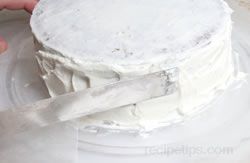
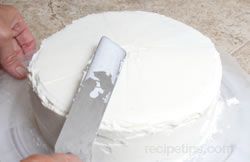
- After frosting the top of the cake, spread the frosting around the sides, working with a sufficient amount of frosting.
|
 |
|
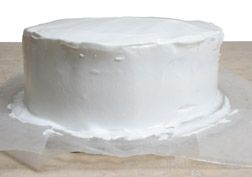
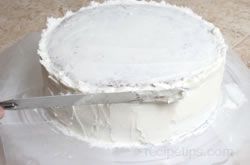
- Once the sides are all frosted, smooth the frosting out by running the spatula vertically around the cake.
|
 |
|
- If necessary, smooth the top again before decorating so you have an even surface to work with.
|
 |
|
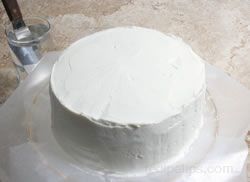
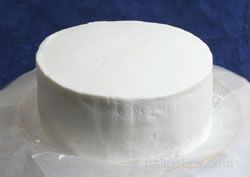
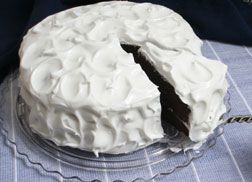
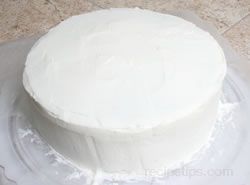
- When the cake is evenly coated around the sides and on top, it is ready for a finishing design pattern. Shown below is a swirled design pattern.
|
|
|
 |
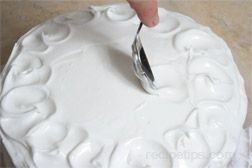
- Using the tip of a spoon, make swirl designs in the frosting. Begin by first making a half circle to the left, starting at the 12 o'clock position; then swirl the spoon down to the 6 o'clock position.
|
|
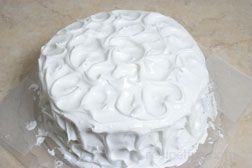
- In the same manner, start at the 12 o'clock position again and swirl to the right; swirl the spoon down to the 6 o'clock position, meeting the bottom of the left half circle. Continue to create the swirled circles until the top has been covered.
|
 |
|
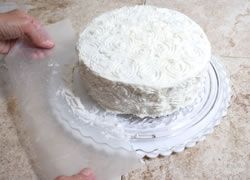
- After the top has been covered with swirls, create the same design pattern all around the sides of the cake.
|
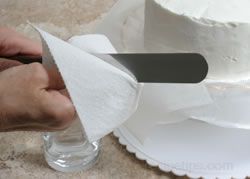
Note: The wax paper should remain on the plate or board until you are confident that there isn't a risk of spilling anything or getting frosting on it. But it should be remove before any type of border or decoration is placed along the very bottom edge or you may run the risk of causing damage when the wax paper is removed. |
- Once the swirled design is finished, carefully slide the pieces of wax paper from under the cake. This should provide a beautiful frosted cake on a clean platter that is ready to serve.
|
|
|
- Note: Other design patterns can be used to decorate when using this frosting, but because of its fluffy texture, detailed decorating patterns should be avoided. The ripple, swirl, and peak patterns are three designs that work well with a light and fluffy frosting.
|
Frosting a Cake Using a Crumb Coating
A crumb coat is a thin layer of frosting that is spread on the sides and top of the cake before spreading the final frosting layer. A crumb coating does not have to be used but there are several advantages to using a crumb coating that make it worth the time and effort.
|
The advantages of using a crumb coating:
- It seals the surface of the cake so that when the final frosting layer is applied it does not pick up the crumbs from the cake.
- When crumb coating a cake that is a different color than the frosting, such as a chocolate cake with white frosting, it helps prevent the color of the cake from showing through the top layer of frosting.
- The crumb coat can help fill in any holes or cracks in the cake, providing a smooth surface for applying the final frosting coat.
- It seals the cake, which helps keep the cake moist.
- When covering the cake with fondant, the crumb coating seals in moisture, helps hold the fondant in place on the cake, and provides a sweet coating for the cake for those who prefer not to eat the fondant.
|
|
Crumb Coating
Once the cake has been assembled it is ready to have the crumb coating applied. Be sure the cake had the crumbs brushed off in preparation before starting the crumb coat. |
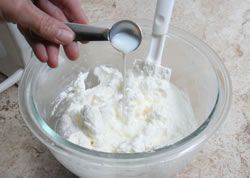
- Divide the frosting in two batches, placing about one third of the frosting in a separate bowl from the other. Thin the smaller batch with the liquid that was used to make the frosting. Add only enough to make the frosting have a thin consistency.
|
|
 |
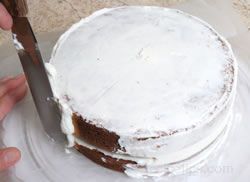
- Place a large scoop of the thinned frosting on top of the cake. Using a spatula, begin spreading the frosting on the top by pushing it out toward the edges. Spread out in a thin layer, trying not to lift the spatula straight up off the cake when spreading the frosting because this will have a tendency to pull some cake off with it.
|
|
 |
- Be sure edges are covered and then use smooth sweeping motions to level the frosting. To lift the spatula off the cake, bring it up at a perpendicular angle from the cake and then lift it off. If there are any crumbs on the spatula, be sure to remove them by scraping it on the edge of another bowl before digging into get more frosting.
|
|
 |
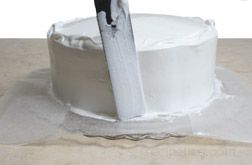
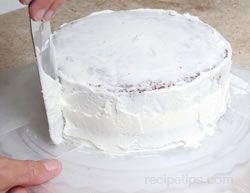
- After spreading the thin layer on the top of the cake, apply the crumb coating to the sides. Spread the frosting with the spatula in a vertical position, using a back and forth motion. Try not to have the spatula come in contact with the cake and turn it perpendicular to the cake when needing to pull it off.
|
|
 |
- After sides are covered, smooth the sides by holding the edge of the spatula vertically along the side of the cake. Turn the cake so that the edge of the spatula is scraping just the surface of the crumb coating and smoothing it out. Remove excess frosting.
|
|
 |
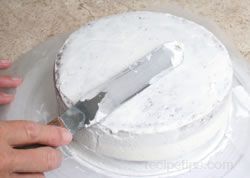
- Smooth the top in the same manner with the flat edge of the spatula. The smoother the crumb coating is the better the frosting or fondant layer will go on.
|
|
 |
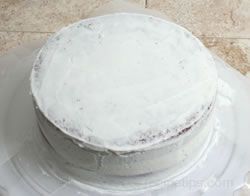
- Allow the crumb coating to sit on the cake for at least 30 to 40 minutes before frosting the cake with the top layer of frosting.
|
|
 |
|
Frosting the Cake
After the crumb coat has sat for the appropriate time, the top layer of frosting can be applied. This layer of frosting can then be smoothed to prepare it for further decorating or a decorative pattern can be applied to it. Before beginning to apply the frosting, be sure that you have enough frosting to coat the cake with an even layer. |
|
|
- Begin by applying a large scoop of frosting to the side of the cake and spread it out around the cake on all sides. First work as quickly as possible to get the frosting spread and worry about smoothing it out once the entire cake is covered.
|
|
|
- Spread the frosting evenly around all sides of the cake. Be sure to use enough frosting so that it flows easily without having to apply too much pressure. Using too much pressure can cause the crumb coating to be disturbed, running the risk of getting crumbs in the top layer of frosting. Spread the frosting up the sides of the cake so that it is about 1/4 inch above the edge.
|
|
|
- Once the sides are evenly covered with frosting, add a scoop to the top and begin spreading it around by pushing it to the outer edges. Spread evenly across the top, filling in to the frosting extending above the edges of the cake from the sides.
- Check the cake for levelness; if necessary, add more frosting in the low areas and then level it out.
|
- To smooth the top layer of frosting, begin by first smoothing the sides of the cake. Smooth the sides by holding the edge of an offset spatula vertically on the side of the cake and spin the cake around on the lazy susan, allowing the edge of the blade to smooth out the sides. Do not apply too much pressure; you are just trying to smooth the layer and should be only removing a minimal amount of frosting as you are smoothing it out. Do not lift the spatula off the side until done smoothing. Wipe any excess frosting that accumulates on the blade back into the frosting bowl.
- Any frosting that accumulates along the top edge when smoothing the sides should be spread in towards the center of the top of the cake.
|
 |
|
- Smooth the top of the cake by placing the end of the offset spatula in the center of the cake. Tilt the spatula only slightly and then spin the cake around once to smooth out the top.
|
 |
|
- After the frosting has been spread evenly over the top and sides of the cake, the frosting can have a decorative frosting design applied to it or it can be smoothed to prepare it for additional decorating.
- If you want to apply an extra smooth finish for detailed decorating, see the special instructions below.
|
Protective Wax Paper
|