|
See More Information on Canning Vegetables and Fruits:
Canning Vegetables and Fruits | Canning Preparation
Canning Temperatures and Processing Times | Canning Safety, Storage, and Tips
Boiling-Water-Bath | Pressure Canning
There are two safe methods that can be used, boiling-water-bath and pressure canning. The type of food being canned will generally determine which method is used. For information on which canning method to use for certain foods, see Food Acidity in Canning Temperatures and Processing Times. The information below provides you with instructions on using these canning methods for preserving vegetables and fruits.
Canning - Boiling-Water-Bath
Tomato Juice - Preparation
-
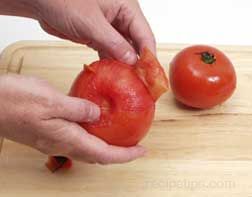
Wash the tomatoes and remove stems and any bruises or blemishes. Skins do not need to be removed.
-
Cut 2 or 3 tomatoes into quarters and place directly in a large saucepan. Start heating the tomatoes to bring then to a boil, crushing them while they are heating to produce juices for the tomatoes to cook in. Stir to prevent burning.
-
Bring tomatoes to a boil and finish cutting the remaining tomatoes into quarters, adding them to the boiling tomatoes as they get quartered. Keep the tomatoes boiling strongly as you add quartered tomatoes so that they are constantly boiling.
-
After all the tomatoes have been quartered and add in the boiling tomatoes, allow all the tomatoes to simmer for 5 minutes.
-
After simmering for 5 minutes, remove skins and seeds by pressing the cooked tomatoes through a chinois strainer with pestle. A regular sieve or food mill could also be used.
-
Have jars and lids properly prepared (see instructions Canning Jar and Lid Preparation). To ensure proper acidity, add two tablespoons of bottled lemon juice to each quart jar (one tablespoon per pint) or 1/2 teaspoon of citric acid (1/4 teaspoon per pint). Add 2/3 teaspoon of salt and 1 1/3 teaspoons of sugar to each quart jar.
-
After removing skins and seeds put the tomato juice back in the saucepan and heat just until juice comes to a boil.
-
Pour the hot tomato juice into the prepared jars using a ladle. Fill the jars, leaving 1/2 inch headspace.
-
Clean any spillage from the rim of the jar and then place the lid on the jar. Screw the ring onto the jar just until it is tight. Do not over tighten. The tomato juice is now ready to be processed.
Boiling-Water-Bath Canning of Tomato Juice
-
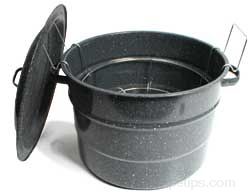
Fill the boiling-water-bath canner half full of clean water. Heat water to 140°F for raw packed jars and to 180°F for hot packed jars. This heating process could be done while packing the jars.
-
Place the empty rack into the heated water and then using the jar lifter, carefully lift the jars and place them in the rack. Be sure that the jar lifter is secure around the neck of the jar, just below the screw ring. Be careful not to tip the jars as they are being lifted into the canner. If jars are tilted too much, liquid can spill into the sealing area of the lid and may prevent the jar from sealing properly.
-
Another method of placing the jars in the canner is to pack the jars in the rack before placing it in the canner. Pack all the jars into the rack and then use the handles on the rack to lift it and the jars into the heated water. Be careful not to tip the jars as they are being placed into the rack and when lifted into the canner. The rack will be heavy so you may need help lifting it into the canner if using this method.
-
Check the water level after the jars are all placed in the canner. It should be at least one inch over the top of the jars. For longer processing times, have the water level 2 inches above the top of the jars. If level is not high enough, add boiling water to increase it to the proper level.
-
Using high heat, bring the water to a full boil. After the water has come to a rapid boil, place the cover on the canner and reduce the heat enough to keep the water at a gentle continuous boil. Set timer for proper processing time. Don't forget to adjust time for altitude if necessary.
-
Check water level occasionally through processing time to be sure it is remaining at the proper level. Add more boiling water if necessary.
-
After boiling for the full processing time, turn off the heat and remove the cover.
-
Have a folded towel ready for placing the jars on when processing is complete. Using the jar lifter, carefully remove the jars from the canner and place them on the towel. If desired, a cooling rack can be used to place the processed jars on for cooling. Leave at least 1 inch between the jars to allow for air circulation while cooling. Do not try to re-tighten the screw band after processing because that may disturb the sealing process that has already started to form. Allow jars to cool for 12 to 24 hours before handling.
Canning - Pressure Canning
Canning Preparation - Green Beans
-
Leave beans whole or cut to desired size. Using the raw pack method, pack beans tightly into prepared jars leaving a 1 inch head space.
-
Add 1 teaspoon of canning salt per quart jar.
-
Pour boiling water into each jar, covering the beans. Be sure to leave 1 inch headspace.
-
Have lids properly prepared (see instructions Canning Jar and Lid Preparation). Clean any spillage from the rim of the jar and then place the lid on the jar.
-
Screw the ring onto the jar just until it is tight. Do not over tighten. The beans are now ready to be processed.
Pressure Canning of Green Beans
The directions below are general instructions for pressure canning. Be sure that you read the manufacturer's directions for the type canner being used before starting the canning process.
-
Fill the pressure canner with 2 to 3 inches of clean water. Be sure to check the recipe to see if more water is required. Some foods require more than 3 inches but generally 2 to 3 inches are sufficient. Place the canner centered over a burner. Heat water to 140°F for raw packed jars and to 180°F for hot packed jars. Heating the water above these temperatures may cause the jars to crack when they are placed in the canner. Also, be careful that the water is not boiled or heated for too long because it would affect the depth of the water.
-
Place the rack into the heated water and then using the jar lifter, carefully lift the jars and place them on the rack. Be sure that the jar lifter is secure around the neck of the jar, just below the screw ring. Be careful not to tip the jars as they are being lifted into the canner. Tipping the jars may cause liquid to get into the sealing area of the lid and cause the jar to not seal properly.
-
Place the cover on the canner and fasten it securely. Do not place the weight on the vent port or petcock. It should be left open.
-
Using high heat, bring the water to a full boil until a steady stream of steam is escaping through the vent port or petcock. Continuing with high heat, allow the steam to escape for a full 10 minutes to be sure all of the air has been removed from the canner. This process is called "venting" or "exhausting" the canner. If air is left in the canner it will cause inadequate processing.
-
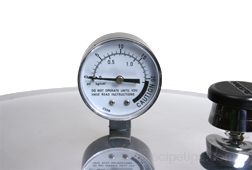
After the venting is complete, place the weighted gauge on the vent port or close the petcock. This will pressurize the canner within 3 to 5 minutes. Allow the canner to reach the required pressure. Don't forget to adjust pressure for higher altitudes if necessary. See charts in Canning Temperatures and Processing Times.
-
Do not start timing the processing until the required pressure is reached on the dial gauge or when the weighted gauge begins to giggle or rock as stated in manufacturer's instructions.
-
The heat can then be turned down slightly but be sure to keep it high enough so that it is at a steady boil to maintain the pressure or a reading slightly above the required pressure. If the pressure should fall below the required reading, turn the heat back up to get the pressure back up to what it should be and then start the entire processing time all over.
| Note: If the pressure is not maintained it can cause the food to be under processed. If there is a sudden or large drop in pressure during processing it can cause the liquid to drawn out of the jars and prevent proper sealing. |

-
When the processing time is complete, turn the heat off and remove the canner from the burner. Allow the canner to cool naturally. Do not try to cool it down with cold water or cold towels. Forcing it to cool down can cause food spoilage, can force liquid from the jars, causing them not to seal, and can warp the canner lid.
-
As the canner cools it also begins to depressurize. Allow to cool until the dial on the gauge reads zero. For weighted gauge canners you will have to time the cooling process. Cool pint jars for 30 minutes and quart jars for 45 minutes. Some of the newer thinner walled canners may cool down quicker. The newer canners have vent locks that are designed to stay locked until the canner has depressurized, preventing the lid from being removed until they unlock.
-
Even after the canner has cooled and depressurized, be cautious when opening the petcock or removing the weighted gauge from the vent port. Wait for 10 minutes before removing the lid.
-
Unfasten the lid and carefully remove the lid by lifting the far side up and away from you so any escaping steam does not come back in your face.
-
Have a folded towel ready for placing the jars on when removing them from the canner. Using the jar lifter, carefully remove the jars from the canner and place them on the towel. If desired, a cooling rack can be used to place the processed jars on for cooling. Leave at least 1 inch between the jars to allow for air circulation while cooling. Do not place in an area where the jars would be in a cold draft.
-
Do not try to re-tighten the screw band after processing because that may disturb the sealing process that has already started to form. Allow jars to cool for 12 to 24 hours before handling.
-
Once the jars have completely cooled, remove the screw band and wipe the jars clean of any residue. Check the jars to see if they sealed properly. If a jar did not seal, place it in the refrigerator and use within 2 or 3 days. |


