|
Also, see How to Make:
Easter Nests | Easter Candy Eggs
A well known candy that is popular at Easter is Peeps®. You will find bunnies and baby chicks in many colors anywhere that Easter candy is sold. Marshmallow Easter treats can also be made at home. You can make these marshmallow treats in your family's favorite shapes and colors. The kids can watch them take shape and join in to help decorate them.
For decorating the homemade Easter marshmallow treats, you need decorating sugar and cookie cutters of the shapes you want to make. The only other ingredient needed for decorating is a dab of chocolate to add some eyes to the bunnies and chicks. The sugar can be any color(s) desired.
Making the Marshmallow Treats | Cutting and Decorating Marshmallow Treats
| Homemade Marshmallow Easter Treats |
Ingredients: |
 |
- vegetable oil
- powdered sugar
- 1/2 cup cold water
- 2 envelopes of unflavored gelatin
- 1 1/3 cups sugar
|
|
- 1/3 cup water
- 1/2 cup light corn syrup
- 1/4 tsp. salt
- 1 tsp. vanilla
- colored decorating sugar
- 4 or 5 chocolate chips, melted
|
|
Making the Marshmallow Treats
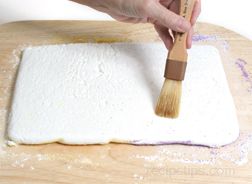
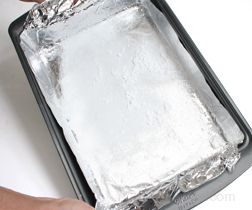
- Prepare a 9 x 13 baking pan by first lining it with foil. Then dampen a paper towel or basting brush with vegetable oil and coat the bottom and sides of the foil. Then dust the bottom and sides generously with powdered sugar. Set the pan aside until needed.
|
|
 |
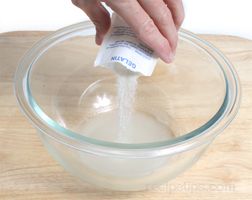
- Add 1/2 cup of cold water to a mixing bowl and then sprinkle the gelatin over the top of the water. Stir to break up any clumps and then set gelatin mixture aside.
|
|
|
- In a medium saucepan that has a fitted cover, add the sugar, 1/3 cup of water, syrup, and salt. Stir until sugar dissolves. Turn the heat on very low just to aid in dissolving the sugar. Once the sugar has melted, place the cover on the pan and turn the heat on medium low or a little lower.
|
|
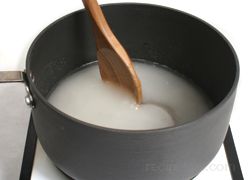 |
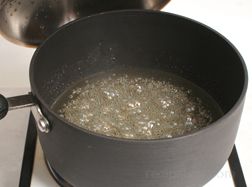
- Allow the mixture to cook, covered, for approximately 5 minutes. Remove the cover and the sugar mixture should be bubbling slowly. The steam from this covered cooking time should dissolve any sugar crystals that were beginning to form. Do not remove the pan from the heat.
|
|
 |
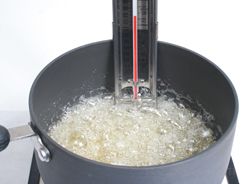
- Insert a candy thermometer in the syrup and increase the heat to medium high. The syrup should come to a steady boil. Do not stir the mixture during this cooking time. Boil until the syrup is at 240°F or a soft-ball stage. DO NOT LET IT GET PAST THIS STAGE! It would be better to remove it from the heat at 238° or 239°F than to allow it to heat up past the soft-ball stage.
|
|
 |
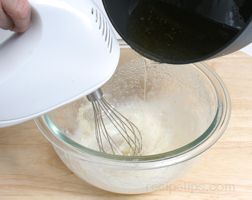
- Have the mixer ready and the gelatin mixture nearby. Once the syrup is at the proper temperature, remove it from the heat and immediately begin to slowly, but steadily, pour the syrup into the gelatin mixture and beat at a medium low speed while adding the syrup.
|
- Continue to pour the syrup into the bowl, beating at all times, until it is all added. It is best to be pouring the syrup into the area where the beaters are mixing so that it is immediately incorporated into the gelatin mixture.
|
|
 |
- Note: We began the mixing process with a whisk type beater. As we were mixing in the syrup, we realized the whisk beater was not going to be strong enough to finish the mixing so, once the syrup was all added, we quickly switched the whisk beater for regular beaters and finished the mixing with them. We would recommend using the regular beaters throughout the entire mixing process.
|
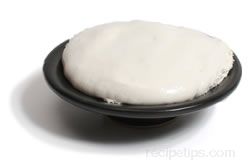
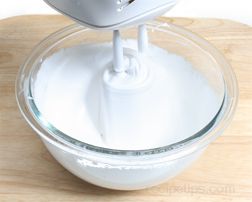
- After all the syrup has been added, increase the speed of the mixer to high and continue to beat until the mixture is very thick, similar to the consistency of marshmallow creme.
|
|
 |
- While beating, the mixture will have a tendency to climb up the beaters. If this begins to happen, continue to beat but lift the beaters up out of the mixture about half way and hold them there until it moves back down. You may have to move the beaters up and down in this manner during the last few minutes of mixing. It may take 8 to 10 minutes of beating before the mixture is the proper consistency.
|
 |
|
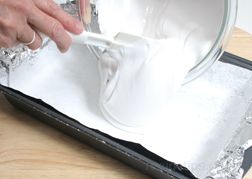
- Once the marshmallow mixture is the proper consistency, pour it into the prepared baking pan.
|
 |
|
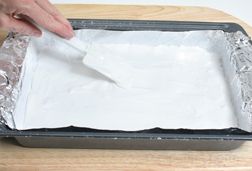
- Smooth the mixture as evenly as possible in the pan.
|
 |
|
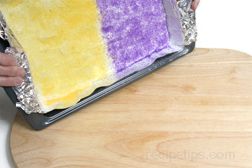
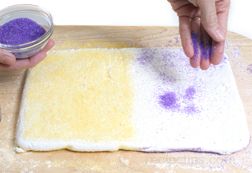
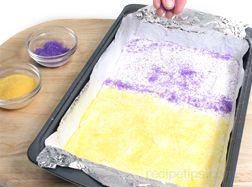
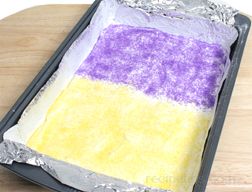
- Sprinkle the top of the marshmallow mixture with the colored sugar. You can use one color or two if desired. If you use two colors, realize that when the mixture is turned out of the pan, the colors may get mixed together in some areas.
|
 |
|
- Give the mixture a fairly good coat of sugar but realize that you will be tossing the marshmallow shapes in sugar again at the end so if it isn't perfectly even it will be satisfactory at this point.
|
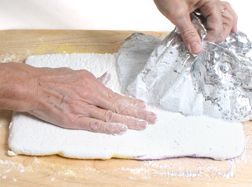
- After the sugar is added allow the mixture to dry before trying to cut out the shapes. This may take as little as two hours or it may take more than 8. The longer you allow it to dry the easier the cutting process will be. If you allow it to set overnight, cover it lightly with a piece of foil but do not seal. Leave a small corner uncovered to allow air circulation.
|
|
|
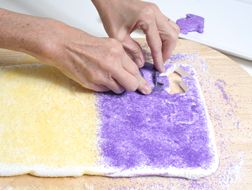
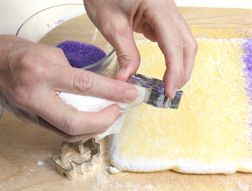
- Once the sugar has been applied, begin cutting out the shapes. Place the cutter on the surface and press firmly, making sure to cut all of the way through the marshmallow mixture. Cut the shapes out close to each other to get as many out of the mixture as possible.
|
 |
|
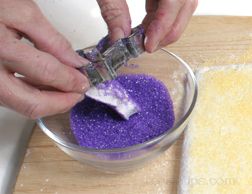
- After the shape has been cut out, remove it from the cutter and place in a bowl of colored sugar.
|
 |
|
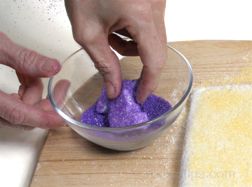
- Toss the shape in the sugar to coat the edges and sides evenly. Place on a platter and continue cutting more shapes out.
|
 |
|
- As you are cutting the shapes out, the cutter may become sticky, making it hard to cut the shapes smoothly. If the cutter becomes sticky, rub it down lightly with a paper towel dampened with a little vegetable oil.
|
 |
|
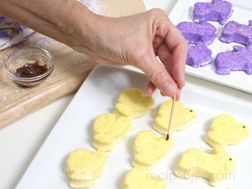
- Once the marshmallow treats have all been cut out, melt the chocolate chips in a small bowl in the microwave. Melt them in 15 second intervals and watch carefully because they will melt quickly. Stir after each 15 seconds. Once melted, use a toothpick and add a chocolate eye to each of the marshmallow shapes.
|
 |
|
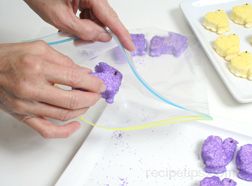
- Allow the chocolate eye to dry and harden. Then place the Easter marshmallow treats in a sealable bag or in an airtight container for storage.
|
- The homemade Easter marshmallow treats can be eaten immediately or they can be used to decorate a basket for Easter.
|
|
 |
Get Easter Marshmallow Treats recipe. | |


