


Sourdough Starter | Sponge Starter | Old Dough Method
|
The primary difference between making bread with a starter and making bread with the direct or straight yeast method is that starter breads require much more time to prepare, but the flavor and texture of the bread is almost impossible to achieve with other leavening methods. The initial fermentation of the starter and the subsequent rising time of the dough contribute to the lengthier process. Some starters may be ready in a few hours, while sourdough starters may require several days of fermentation before the bread can actually be prepared. There are several traditional methods for creating starters for breads. All of the starters can be easily prepared by the home cook. |
Sourdough Starter
|
Many of the breads created with a sourdough starter feature a chewy crust, open crumb, a moderately dense texture, and a slightly sour flavor and aroma that are very pleasing. These qualities are difficult to produce with other leavening methods. A starter made with the traditional sourdough method is created simply by combining flour and water, which is allowed to ferment by airborne yeast. Some sourdough starters may include some commercial yeast to speed the fermentation process. It is worth noting that the recipe for a sourdough starter may differ depending on the type of sourdough bread being prepared. Described below is one method for creating a typical sourdough starter, however the procedure and ingredient quantities will change according to the bread recipe. |
| Place ¼ cup of bread flour (wheat) on a smooth work surface. Create a small well in the flour and add 2 tablespoons of water. |
|
| Use a finger to push some of the flour into the well of water with a circular, stirring action. | 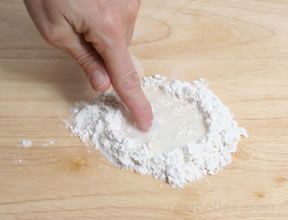 |
| After the flour and water are blended, knead the ball of dough for several minutes. It may not be possible to knead the dough with anything other than a finger or two rather than the heel of your hand, due to the small size of the dough. | 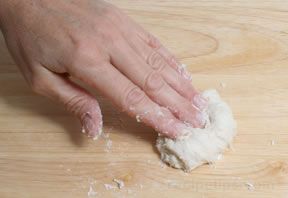 |
| Place the dough in a bowl, cover it with a kitchen towel that has been slightly dampened, and place the bowl in a warm, draft-free location for up to 2 days. During this stage, the small piece of dough starter is known as the "chef." | 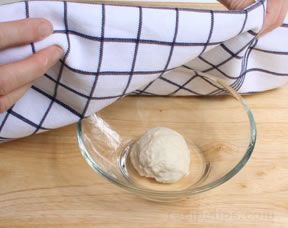 |
| At the end of the initial fermentation period, a hard, thick crust will develop over the bubble-filled chef. Remove the crust before proceeding to the next step. The remaining chef will be a gooey mass smaller than a golf ball. | 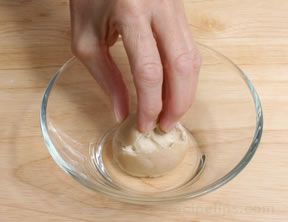 |
| At this stage, the chef starter requires refreshing with additional flour and water. Place ½ cup of flour (double the quantity of flour that was originally used) on a smooth work surface and once again create a well in the flour. | 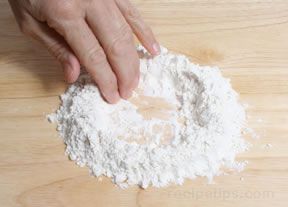 |
| Place the chef in the center of the well, add a small quantity of water (1 or 2 tablespoons), and using your finger or a wooden spoon, blend the chef with the water to create a thin paste. | 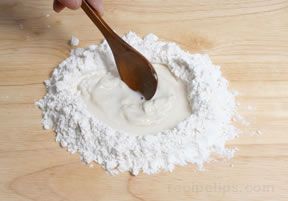 |
| Using the same technique as before, slowly blend the fresh flour into the paste and add enough water to create a dough. Knead the dough for several minutes, place in a bowl, cover, and set the bowl aside (in a warm, draft-free location) for 1 day. | 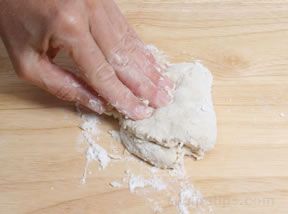 |
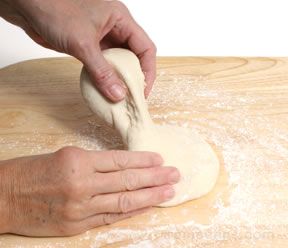
| At this stage, the starter is known as a "levain." A crust will form again, but it will be thinner than the crust that formed over the chef. Pinch the crust in the center of the starter and lift to remove it in one piece. Using the same steps used when refreshing the chef, make a well in the center of 1 cup of flour (which again is double the quantity used previously), place the levain in the center of the well, and add water to create a paste. (It is often easier to add water directly into the bowl in which the levain had been fermenting, stirring to create a paste, and then pouring the paste into the well of flour.) Push the flour into the center of the well, adding water in small increments to create a dough. Follow the same procedures as before when blending, kneading, and covering. |
| Allow the levain to rest for at least 6 hours, but not longer than 12 hours. The starter is ready when the dough does not spring back after being indented with a finger or spoon. | 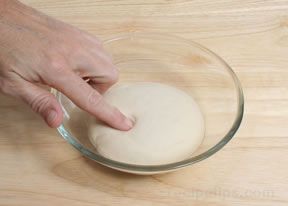 |
| A small portion of the sourdough starter can be reserved and stored for several days in the refrigerator or it can be frozen if it cannot be used until later. This small piece of the original starter can then be refreshed with more flour to create a larger batch of starter for additional bread loaves. | 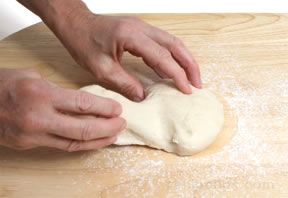 |
Sponge Starter
|
The sponge method for leavening bread is an intermediate method of creating a starter that combines some of the benefits of the direct method with the some of the benefits of the sourdough starter method. Less time is required using the sponge method than with the sourdough method, but the results provide hints of the depth of flavor and texture that result from the sourdough method. Although yeast is used with the sponge method, the quantity is usually much less than when preparing bread with the direct method. Two of the most widely used sponge starters are the French "poolish" and the Italian "biga." |
Poolish StarterA poolish is a sponge starter has the consistency of a thick liquid and is very easy to prepare. It requires only a few hours of fermentation before it can be used, but it produces some excellent qualities, such as depth of flavor and a pleasing aroma usually in found breads prepared with the more time consuming sourdough method. The recipe for a poolish starter will differ depending on the type of bread being prepared, but often the only difference is in the quantities of the ingredients that are used in the starter in relation to the quantities of the ingredients in the full recipe. Although the ingredient quantities between the starter and the dough would change proportionally, the quantity of yeast usually does not change proportionally, so care must be taken when determining the proper quantity of yeast to use when adapting a poolish starter for use with different bread recipes. Too much yeast will adversely affect the flavor and texture of the bread. Described below is a typical procedure for preparing a poolish starter, however the procedure and ingredient quantities will change according to the bread recipe. |
| To begin, pour ¼ cup warm water (95º to 115ºF) into a small bowl and add one teaspoon active dry yeast. |
|
| Stir the yeast and water with a wooden spoon and let the mixture stand for about 10 minutes. | 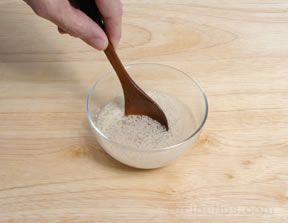 |
| Pour the yeast mixture into a large bowl and add ¾ cup warm water. | 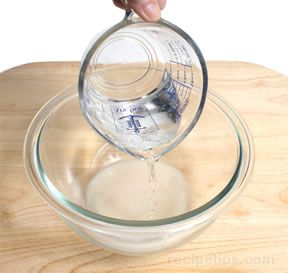 |
| While stirring the liquid with a wooden spoon, add one cup of flour in small intervals, making sure that the flour is well incorporated with the liquid. | 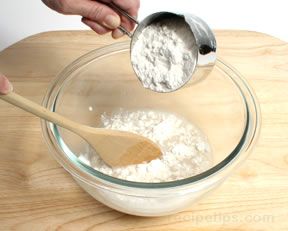 |
| The consistency of the sponge starter should be like batter rather than dough. | 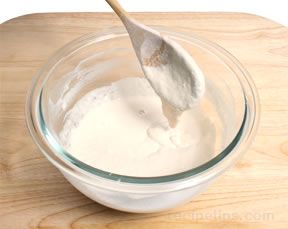 |
| Cover the bowl with a kitchen towel and allow it to stand for several hours - 6 hours is usually the maximum time required. | 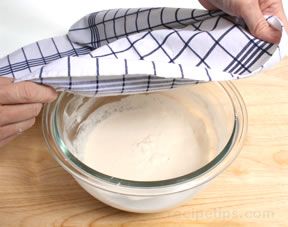 |
| The sponge starter should more than double its original size. It is ready to use after it rises and then falls back. It is at this point that it can be added to the remaining flour and other ingredients called for in the bread recipe. | 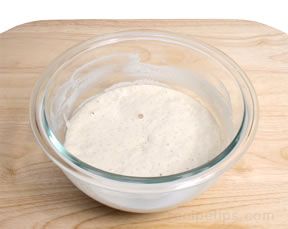 |

Biga StarterA biga starter is an Italian version of the sponge leavening method or French poolish. It differs from a poolish in that it is firm and dough-like instead of batter-like and it requires a longer fermentation period. Breads made with a biga starter feature a subtle flavor, a porous texture, moist, open crumb, and a champagne aroma. Like other starters, there are several methods for preparing a biga starter, but the biga recipe will differ with each type of bread being made. Often the same recipe for the biga starter can be used for a number of breads if the quantities of the ingredients in the biga starter are changed proportionally to the quantities of the ingredients in the full recipe. However, the quantity of yeast usually does not change proportionally, so care must be taken when determining the proper quantity of yeast to use when adapting a biga starter for use with different bread recipes. Too much yeast will adversely affect the flavor and texture of the bread. Described below is a typical procedure for preparing a biga starter, however the procedure and ingredient quantities will change according to the bread recipe. |
| In a small bowl, cream ¼ ounce fresh yeast in ¼ cup warm water (95º to 115ºF). Allow it to sit 7 or 8 minutes. |
|
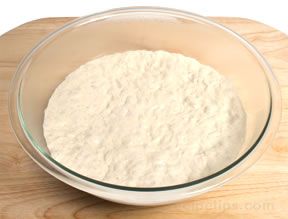
| In a large bowl, add 3 cups of flour and form a well in the center. | 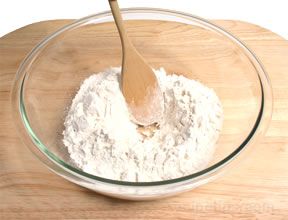 |
| Add the yeast mixture to the well and begin pushing the flour into the well. Add enough water (up to another ¾ cup) to create a dough that is firm, but not too dry. | 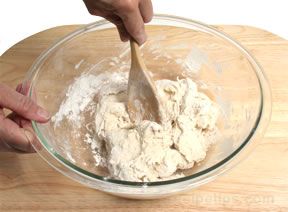 |
| Transfer the dough onto a floured work surface and knead it for several minutes to form an elastic and firm ball of dough. | 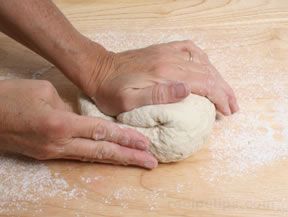 |
| Place the ball of dough into a bowl, cover with oiled plastic wrap, and allow it to rest in a warm location for 12 to 16 hours. | 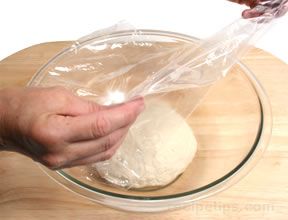 |
| When the biga has risen and then begins to fall back on itself, it is ready to use. It can also be frozen to extend the life of the starter, but should be used within several weeks. |
 |

Old Dough Method
| Another traditional method for leavening bread is with the use of old dough. While preparing bread, a small piece of the dough can be removed and used as the starter for the next batch of bread. Remove the small piece of dough after the rising period and store it in a covered bowl in the refrigerator for two days. When it is ready to be used, allow it to rest at room temperature for two or three hours. If the old dough will not be used within a few days, it can be frozen for up to six months. It should be loosely wrapped in wax paper followed by a wrapping of foil. When it is ready to use, it should be thawed in the refrigerator overnight before bringing it to room temperature. |
|
| Note: Salt and sweeteners are usually not added to starters unless a change in the rate of fermentation is desired. The addition of salt will slow the rate of fermentation and the addition of a sweetener will speed the fermentation rate. |


