|
Rolled Sugar Cookies | Storing Cookies | Cookie Tips
Rolled Sugar Cookies
Dough Preparation | Rolling Dough & Cutting Shapes | Baking | Decorating
There are many recipes available for rolled out sugar cookies that can be used to make cutouts. When making cutout cookies you want a recipe that is sturdy enough that the cookies will hold their shape but also a recipe that is flavorful. The recipe below will produce a cookie that is both flavorful and sturdy but if you have a favorite you have tried before and prefer to use that, just prepare the dough as instructed in the recipe and then follow the instructions below for rolling, baking, and decorating.
Sugar Cookie Dough Preparation
| Cutout Sugar Cookies |
Ingredients: |
 |
- 1/2 c. butter, softened
- 1/2 c. shortening
- 1 1/2 c. powdered sugar
- 1 egg
- 1 tsp. vanilla
|
|
- 1/2 tsp. almond extract
- 2 1/2 c. flour
- 1 tsp. baking soda
- 1 tsp. cream of tartar
|
>
 |
|
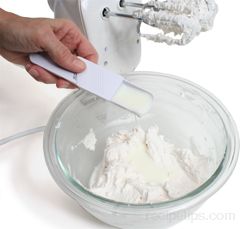
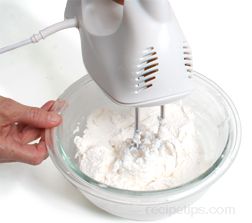
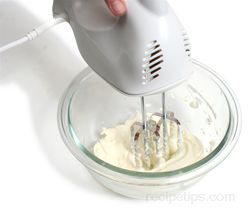
- Place the butter and shortening in a mixing bowl and cream together for approximately 2 minutes.
|
 |
|
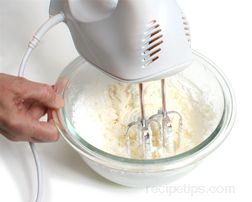
- Add the powdered sugar and beat for 2 additional minutes.
|
 |
|
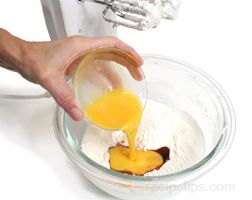
- Beat the egg slightly and add to the butter and sugar mixture. Also add the vanilla and almond extract.
|
 |
|
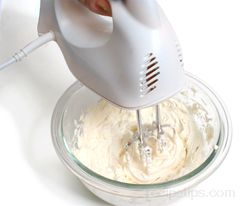
- Beat these ingredients in with the butter and sugar mixture until it is light and fluffy.
|
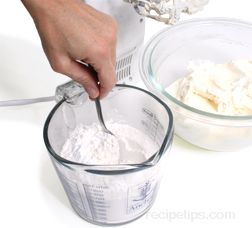
- In a separate bowl, mix the remaining dry ingredients. Stir the ingredients until well distributed.
|
|
 |
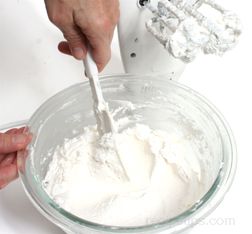
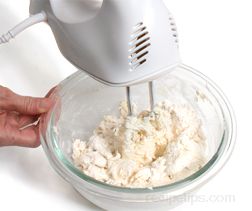
- Add to the fluffy batter and mix on low with electric mixer or by hand until well blended.
|
|
 |
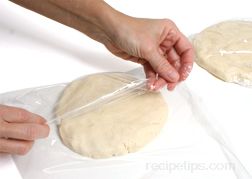
- Once the sugar cookie dough is well blended, divide it in half. Form each half into a flattened disk and wrap in plastic. Refrigerate for at least 30 minutes, or until firm, before beginning the rolling process. The dough can be refrigerated overnight if desired.
|
|
 |
Rolling Out Dough and Cutting Cookie Shapes
Rolling on Floured Surface | Cutting Shapes on Floured Surface
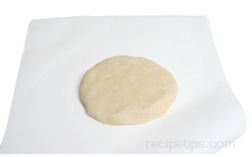
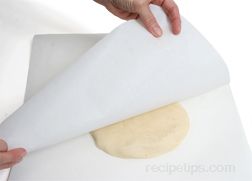
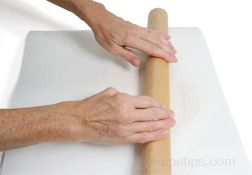
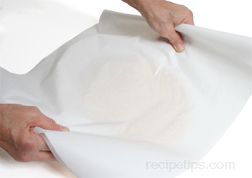
Rolling Between Parchment | Cutting Shapes on Parchment
| Rolling Out Dough on Floured Surface |
 |
|
- Remove one of the dough halves from the refrigerator. If the dough was refrigerated for over an hour, allow it to sit for about 10 minutes at room temperature before beginning to roll it out. If it is too cold it will crack when trying to roll it out.
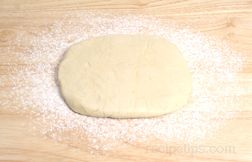
- Place the dough on a lightly floured work surface. Leave the other half in the refrigerator while working with the first half.
|
|
|
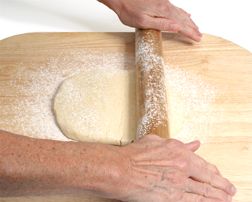
- Lightly flour the rolling pin and begin rolling at the center of the disk. Roll outward but do not roll off the edge of the dough.
|
|
|
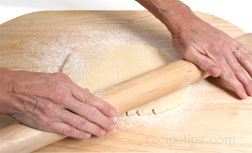
- Rotate your rolling angle about 45° with each roll. Always begin in the middle and roll outward. Once you have rolled the top half, lift and turn the dough a half turn to prevent sticking and to roll out evenly.
|
- If the dough is a little sticky, lightly flour the work surface or rolling pin, depending on where it is sticking. Do not over flour the dough, use as little as possible because the additional flour will have an affect on the taste of the cookies.
|
|
|
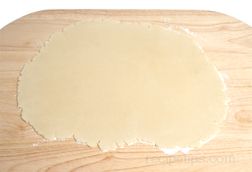
- Continue this process until the dough is getting too thin to pick up without tearing. Continue to roll until the dough is 1/8 to 1/4 inch thick. The thinner the dough is rolled the crisper the cookie will be. Do not roll too thin or the cookie will break too easily when decorating. If they are too thick they will be soft.
|
| Cutting Cookie Shapes on Floured Surface |
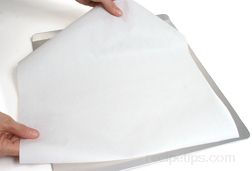
- Prepare the cookie sheet by lining with parchment paper or lightly greasing it. Be sure the cookie sheet will fit in the oven properly before placing cookies on it. See Baking Note below.
|
|
 |
|
|
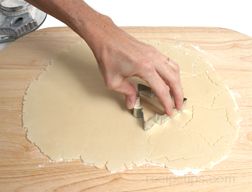
- Before beginning to cut out the shapes, dip the cutting edge of the cookie cutters into some flour. This will help to prevent the cutters from sticking to the dough.
- Cut the shapes into the dough by applying even pressure on the floured cookie cutter, pressing all the way through the dough.
|
- Continue to cut the shapes in the dough with the cutters, placing them as close as possible to each other to maximize the use of the dough.
|
|
|
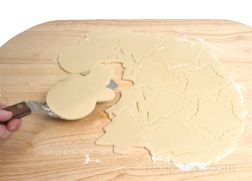
- Pull the scrap pieces away from around the cookies and place them in a bag. Refrigerate until ready to reroll. The scrap dough can be rerolled for cutting more shapes but the quality of the cookies will be slightly less than the first cutouts.
|
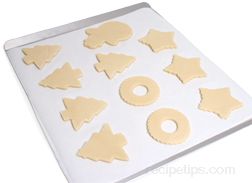
- Use a thin metal spatula to carefully lift the cutout cookie off the work surface. Try to slide the spatula as far under the cookie as possible to help maintain its shape when transferring to the cookie sheet. Place the cookies on a cookie sheet lined with parchment paper or one that has been lightly greased.
|
- Leave about 1 inch of space between each to allow for spreading of the cookies while baking.
|
|
 |
Cutting Cookie Shapes on Parchment Paper |
 |
|
- Prepare the cookie sheet by lining with parchment paper or lightly greasing it. Be sure the cookie sheet will fit in the oven properly before placing cookies on it. See Baking Note below.
|
 |
|
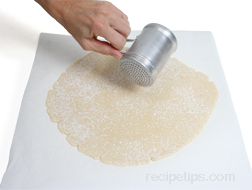
- Remove the top sheet of parchment paper from the rolled out dough. Lightly flour the cookie dough.
|
 |
|
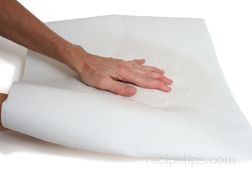
- Replace the top sheet of parchment, place one hand under the bottom sheet and one hand on the top sheet. Carefully flip the dough over between the sheets of parchment paper.
|
|
|
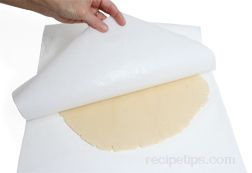
- Remove the top sheet of parchment paper. The floured surface is now on the bottom. This will allow the cut shapes to be lifted off the parchment more easily.
|
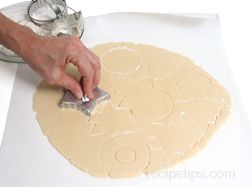
- Before beginning to cut out the shapes, dip the cutting edged of the cookie cutter into some flour. This will help to prevent the cutters from sticking to the dough.
|
- Cut the shapes into the dough by applying even pressure on the floured cookie cutter, pressing all the way through the dough. Several cookie cutter shapes can be used on the dough.
|
|
 |
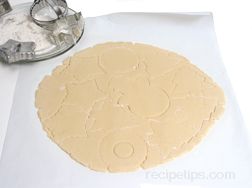
- Continue to cut the shapes in the dough with the cutters, placing them as close as possible to each other to maximize the use of the dough.
|
|
|
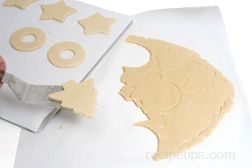
- Pull the scrap pieces away from around the cookies. The scrap dough can be rerolled for cutting more shapes. Using parchment paper allows you to use very little flour when rolling and cutting so the quality of the cookies made from the scraps should be almost as good as the first batch. Place the scrap pieces into a bag and place in the refrigerator until ready to reroll.
|
|
 |
- Use a thin metal spatula to carefully lift the cutout cookie off the work surface. Place the cookies on a cookie sheet lined with parchment paper or one that has been lightly greased.
|
|
 |
- Leave about 1 inch of space between each to allow for spreading of the cookies while baking.
|
|
 |
Baking the Cookies
|
|
|
|
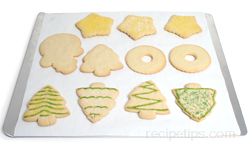
- Cook for 7 to 8 minutes. The cookies are done when they start to brown around the edges. Because all ovens are different, it is a good idea to check for doneness a couple of minutes before the end of the baking time stated in the recipe.
|
- See Baking Note below if using two cookie sheets. Be sure each sheet has the same amount of cookies placed on it.
- Remove the cookie sheet from the oven and allow the cookies to sit on the sheet for 1 or 2 minutes to firm up a little before removing them.
|
|
|
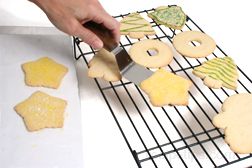
- Using a metal spatula, remove the cookies and place them on a wire cooling rack. The wire rack allows the cookies to cool without trapping moisture as they cool. This helps maintain a crisp texture. Also, allow room in between cookies to provide for proper air circulation.
|
- Once the cookies have completely cooled, they are ready to be decorated.
|
|
Baking Note: Make sure the cookie sheet is not too large for the oven and that there is room around all edges to allow for proper air circulation to provide for even baking. If baking the cookies using two cookie sheets in the oven at the same time, place two racks as close to the middle position as possible. Place one cookie sheet on each rack. Halfway through the cooking time, exchange positions of the cookie sheets and turn each sheet around so the front of the cookie sheets are in the back for the last half of the cooking time.
If it is necessary to bake another batch of cookies, be sure to allow the cookies sheets to cool before placing the next batch on them. If the cookie sheets are warm it will cause the dough to begin to spread, resulting in misshaped cookies. |
Decorating Sugar Cookies
Decorating Cookies before Baking | Decorating Cookies after Baking
The sugar cookies can be decorated in many ways. They do not have to be frosted but they will be much more fun if they are frosted, painted, sugared, or sprinkles with your favorite decorative toppings. Some toppings call for decorating the cookies before baking and some are to be added after. The examples below are just a few ideas of what you can do to decorate your cookies to make them special for the holidays.
| Decorating Cookies before Baking |
- Cut out cookie shapes and place them on a cookie sheets lined with parchment paper or lightly greased.
|
 |
|
- The cookies can then be decorated using several methods, such as:
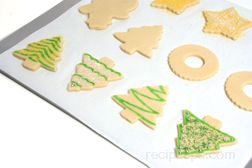
- Sprinkled with sanding sugar, also referred to as coarse sugar, decorating sugar, and sparkling sugar.
- Sprinkled with various types of dragees (small metal balls), non-pareils, or sprinkles.
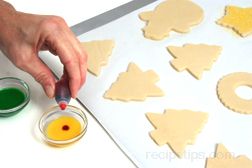
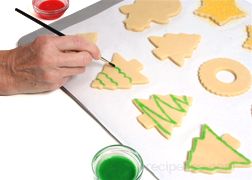
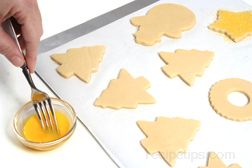
- Painted using an egg yolk and food coloring mixture.
|
|
Sugar or Non-Pareils
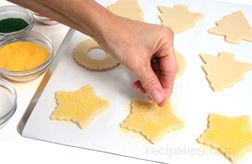
- Mix 1 slightly beaten egg white with 1 tablespoon of water. Lightly brush the tops of the cookies with this mixture. The egg and water mixture will help the sugar and non-pareils stick to the cookies.
|
|
|
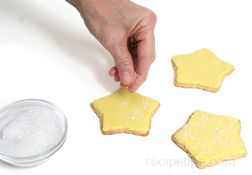
- Sprinkle the sugar or non-pareils on the cookies. They can be lightly sprinkled or more heavily for a darker coloring. More than one color of sugar or non-pareils can be used together for a more interesting affect.
|
|
Decorating Cookies after Baking
The baked cookies can be decorated using frosting or icing. Both will produce a different end result. Frosting will have a creamy texture and can be piped to create shapes. It will remain soft and if made with butter, it will have a rich flavor. One thing to keep in mind is that the decorated cookies will be harder to store because the frosting remains soft.
Icing is a more fluid substance and a little harder to work with. It must be piped on to the cookies because of its consistency. Trying to spread it on with a knife would cause it to run over the edges. After piping the icing on, the icing is thinned and spread on the cookies inside the piping to create a nice smooth surface. The icing will harden, allowing the cookies to be stored more easily. Royal Icing and Powdered Sugar Icing are two icings that are used for decorating sugar cookies. The icing shown below is Powdered Sugar Icing.
|
| Decorating with Frosting |
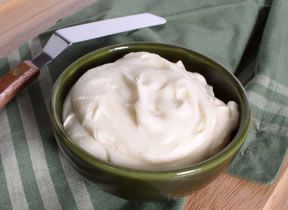
| White Creamy Frosting |
Ingredients: |
 |
- 1 cup shortening
- 1 tsp. vanilla
- 1 tsp. almond extract
|
|
- 4 1/2 c. powdered sugar
- 3 tbsp. milk
- Food coloring
|
 |
|
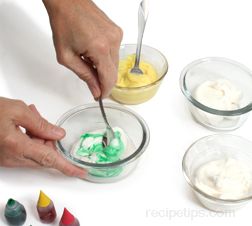
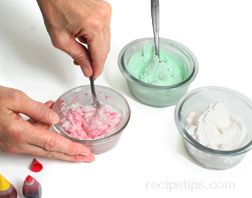
- This recipe will produce approximately 3 cups of frosting. Divide the frosting into as many different colors you would like to create. Use food coloring to create the desired colors. Be cautious when adding food coloring because one drop can make a big difference in the color.
|
|
|
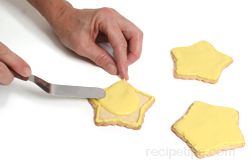
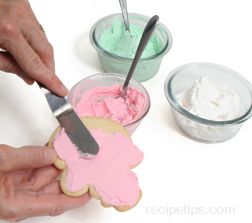
- Applied the frosting by using a spreading spatula or knife to spread it over the top surface of the cookie.
- When you are working with the frosting, be sure the frosting not being used at the time is covered with plastic to prevent it from drying out.
|
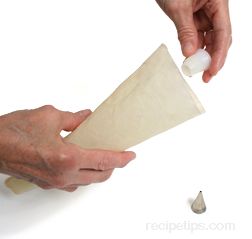
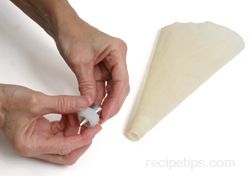
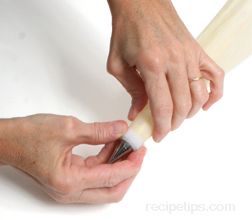
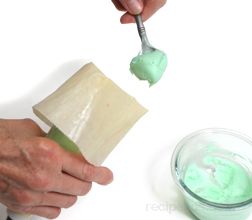
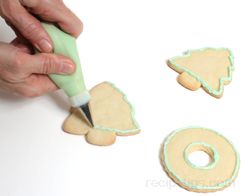
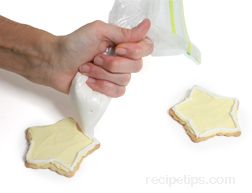
- The frosting can also be applied by piping it on the cookie. One method is to use a pastry bag. Fill it with frosting and attached the desired tip on the end of the bag. Apply the piping as desired. For more information on using a pastry bag, see information below.
- Use the pastry bag to apply piping or decorative designs. Different designs can be accomplished by using different tips on the pastry bag.
|
 |
|
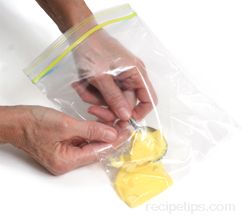
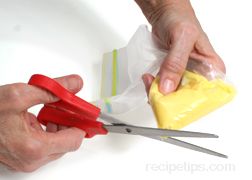
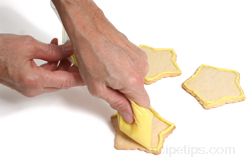
- If you do not have a pastry bag, a plastic bag can be used. Fill the bag approximately 1/3 full of frosting and cut the tip off one corner. Squeeze the frosting out the clipped corner to apply the piping. See the information below on how to prepare the plastic bag for piping.
|
 |
|
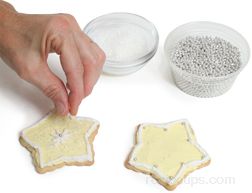
- Once the frosting has been applied, other decorative toppings can be added to further decorate the cookies. Other toppings that can be used are sugars, non-pariels, sprinkles, dragees, nuts, and candy.
|
 |
|
- There is no limit on how to decorate the cookies. The cookies can be decorated with a simple coat of frosting or decorated with a detailed design of the cookie shape. Decorate to suit your own imagination and desire.
|
|
Decorating with Icing
|
| Powdered Sugar Icing |
Ingredients: |
 |
- 2 1/2 c. powdered sugar
- 2 tbsp. water
- 1 tbsp. butter, softened
|
|
- 1 tbsp. light corn syrup
- 1 tsp. almond extract
- Food coloring
|
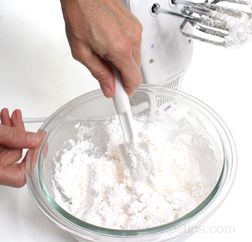
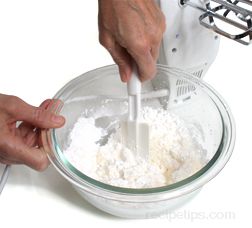
- Add all the ingredients into a small mixing bowl. Stir until powdered sugar is moistened.
|
|
|
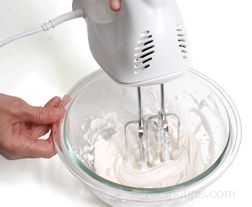
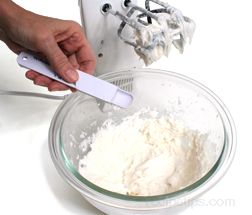
- Beat mixture with an electric mixer until smooth. If icing is too thick, add 1/2 to 1 teaspoon of water and mix again. Continue to add a small amount of water until the icing is at the desired consistency.
- It may be desirable to leave the icing a little thicker to begin with to do the piping on the cookies first. If you are going to do flooding, a little more water can be added to thin the icing at that time.
|
|
 |
- Once the icing has dried, other decorative toppings can be added to decorate the iced cookies. Toppings, such as sugars, non-pariels, sprinkles, dragees, nuts, and candy can be used.
|
 |
|
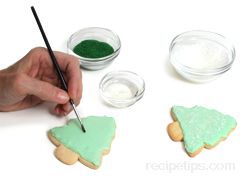
- To decorate after the icing has dried, using toppings such as sugar and sprinkles, apply a light coat of warmed light corn syrup. Use a small paintbrush to apply a light coating of warmed light corn syrup on the cookies in the area that you want the topping to stick.
|
 |
|
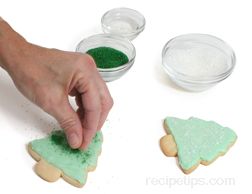
- Sprinkle the coated area with the desired topping.
|
|
|
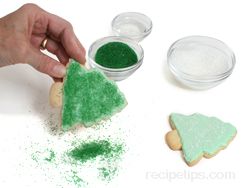
- After applying the topping, lift the cookie up and shake off the excess.
|
|
|
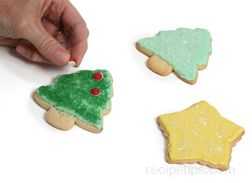
- Other toppings, such as dragees, nuts, and candy can be added by applying a little frosting to the topping and sticking it on the cookie.
|
 |
|
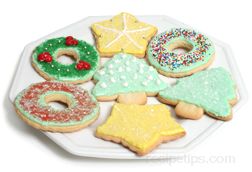
- There is no limit on how to decorate the cookies. The cookies can be decorated with a simple coat of frosting or decorated with a detailed design of the cookie shape. Decorate to suit your own imagination and desire.
- For proper storage of your Christmas cookies, see Storing Cookies below.
|
Storing Cookies
Most cookies can be stored for up to a week without freezing and still retain their freshness. For longer storage they should be frozen. Most cookies can be frozen successfully except for meringue type cookies, those that contain cream cheese or are cream filled. Be sure to use the proper type of storage containers for short term and long term storage. Follow the guidelines below for proper cookie storage.
Proper Storage Container
Using the proper storage container will help maintain the soft or crispy texture of the cookies and keep them tasting fresh for a longer period of time. The guidelines below will help you select the proper storage container.
- Do not use cardboard containers to store cookies. The cookies can absorb odors and flavors from the cardboard, affecting the taste of the cookies. Also, cardboard boxes are generally not airtight, which will cause the cookies to dry out faster.
- Crispy cookies should be stored in a container that has a loose fitting cover, such as a cookie jar or stoneware with a loose lid, to allow some air circulation to maintain their crispiness, unless they are being stored in humid conditions. In humid conditions store in an airtight container.
- Soft cookies should be stored in an airtight container to keep them form drying out. A rigid plastic container, a glass container with airtight covers or a sealable plastic bag can be used. If a container's cover is not airtight, a piece of plastic wrap can be placed over the top of the container before placing the cover on to help seal the container tightly.
- When freezing any type of cookie, use an airtight rigid container that is freezer safe. A sealable freezer bag can also be used but if freezing delicate cookies, it would be best to place them in a rigid container to protect against breakage.
Short Term Storage
To store cookies for up to a week, select the proper type of container for the type of cookie being stored and follow the guidelines below.
|
All Types of Cookies:
- Always allow any type of cookie to cool completely before placing in a storage container. If they are placed in a container while they are still warm they can form moisture, which is then trapped by the cookies, causing them to become too soft.
- Never store different types of cookies together in the same container. The cookies can take on flavor and moisture from each other, causing the original taste and texture of the cookies to change.
- Cookies containing cream cheese or that have cream cheese in the frosting, should be refrigerated.
Soft Cookies:
- Do not store soft cookies and crispy cookies in the same container. The crispy cookies will absorb moisture from the soft cookies and cause them to dry out. Store soft cookies in an airtight container. The cookies can be layered for storage as long as layering will not affect their appearance. To layer, place a layer of cookies on the bottom of the container and then cover them with a piece of wax paper. Place another layer of cookies on top of the wax paper. Place wax paper between each layer being stored but generally it is best not to store more than 3 layers on top of each other. This will help prevent damage to bottom layers.
- If soft cookies begin to dry out, place a slice of bread or a slice of apple in the container. Be sure to place the bread or apple slice on a piece of wax paper and not directly on the cookies.
Crispy Cookies:
- Do not store crispy cookies and soft cookies in the same container. The crispy cookies will absorb moisture from the soft cookies, causing them to loose their crispiness. Store crispy cookies in containers with loose fitting covers to allow for some air circulation.
- If crispy cookies become soft, place them in an oven preheated to 300°F for 3 or 4 minutes and then cool properly on a cooling rack. They should regain their crispy texture.
|
|
Frosted Cookies:
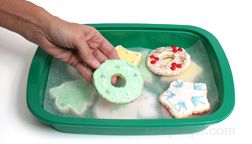
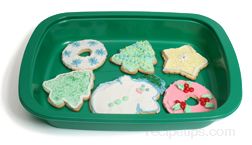
- If the cookies have been frosted with frosting that does not harden, they should be stored in an airtight container in a single layer.
|
|
 |
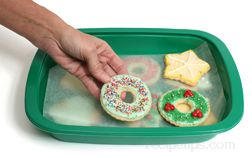
- If they are frosted with icing that hardens, they can be layered in the same manner as the soft cookies.
|
|
 |
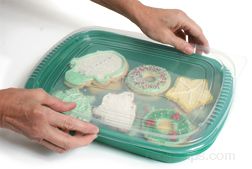
- Do not store more than 3 layers of cookies per container. This will help prevent damage to the frosted cookies. Place the cover on the container and seal tightly.
|
|
 |
Long Term Storage - Freezing
To store cookies for more than a week, select an airtight container for freezing the cookies and follow the guidelines below.
|
All Cookies:
- Always allow any type of cookie to cool completely before freezing.
- Never freeze different types of cookies together in the same container. The cookies can take on flavor and moisture from each other, causing the original taste and texture of the cookies to change.
- Mark the container with contents and date.
Unfrosted Cookies:
- Unfrosted cookies can be frozen for up to 6 months.
- Layer cookies in an airtight container with a sheet of wax paper, plastic wrap or foil between each layer.
- If placing the cookies in a sealable freezer bag to freeze, layer with wax paper, plastic wrap or foil between each and be sure to remove as much air from the bag as possible before sealing.
- Fragile cookies should be placed in a rigid container for freezing to protect against damage.
- Unfrosted frozen cookies can be thawed at room temperature or in the refrigerator.
|
|
Frosted Cookies:
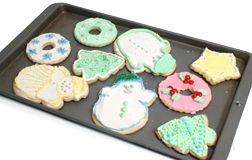
- If the cookies have been frosted, place them on a cookie sheet in a single layer and freeze.
|
|
 |
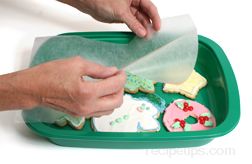
- Once the cookies are completely frozen, place in an airtight container. The frozen cookies can be layered, placing wax paper, plastic wrap or foil in between each layer.
|
|
 |
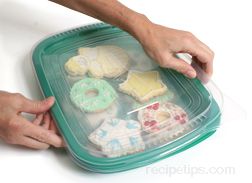
- Place additional layers on top of the first layer of frozen cookies but do not store more than 3 layers of cookies per container. This will help prevent damage to the cookies.
|
|
 |
|
|
|
|
|
Thawing Frosted Cookies: Thaw frosted cookies on cooling racks in a single layer. Thawing on cooling racks will prevent them from taking on moisture and ruining the frosting while thawing. |
Cookie Tips
- If the cookie dough is too soft and will not hold its shape or it is sticky when rolling out, add a little more flour to the dough.
- If the dough is dry and cracks when handling it is lacking enough liquid or fat. Check to be sure the proper quantities of ingredients were used. If so, then add a little milk, softened butter or beaten egg to add moisture and then work it into the dough by hand.
- To prevent cookies from spreading too much as they are baking, chill them properly before placing them in the oven to bake. Also, if the cookie sheet has been greased too heavily it can cause the cookies to spread. Try only greasing very lightly or do not grease at all. Some non-stick cookies sheets do not require greasing.
- Cookies that burn on the bottom but not on top have either been baked in too low of a position in the oven, baked on a low quality cookie sheet, or the cookie sheet was greased with butter. To prevent burning, bake the cookies as close to the middle of the oven as possible, use heavy, good quality cookie sheets that are not real dark in color, and grease the cookie sheets lightly with shortening or oil, avoid using butter for greasing. Also, be sure the cookies are being baked at the proper temperature.
- Be sure that all the cookies on the sheet are consistent in size and thickness so that they all bake evenly. If baking small cookies along with larger ones, the small ones will get done much sooner and begin to brown on the bottom and edges too quickly. Allow room in between them for air to circulate.
- Using parchment paper on the cookie sheets when baking the cookies will prevent them from sticking to the sheet, allowing easy removal of the cookies after they are baked.
|


